

iPhone Photography Basics: Become a Better Landscape Photographer
Iphone photography basics become a better landscape photographer – iPhone Photography Basics: Become a Better Landscape Photographer – Ever dreamt of capturing breathtaking landscapes with your iPhone? It’s possible! This guide will equip you with the knowledge and techniques to transform your iPhone into a powerful landscape photography tool.
We’ll delve into the fundamentals of iPhone photography, exploring composition, light, and editing, to help you elevate your landscape shots from ordinary to extraordinary.
From understanding the iPhone camera’s capabilities to mastering composition techniques, we’ll cover everything you need to know to capture stunning landscapes. We’ll also explore essential editing tools and techniques to bring out the best in your photos. So, grab your iPhone and let’s embark on a journey to capture the beauty of the world around us!
Understanding the iPhone Camera
The iPhone camera is a powerful tool that can be used to capture stunning photos and videos. It’s a versatile tool that can be used for everything from casual snapshots to professional-quality images. But to take full advantage of its capabilities, it’s important to understand the different camera modes, settings, and apps available.
Camera Modes, Iphone photography basics become a better landscape photographer
The iPhone camera app offers a variety of shooting modes that cater to different photographic needs.
- Photo: This is the default mode for capturing standard images. It provides a simple interface for adjusting settings like exposure, focus, and flash.
- Portrait: This mode uses depth-of-field effects to create a blurred background, making your subject stand out. It works best with a single subject, typically a person.
- Panorama: This mode allows you to capture wide-angle shots by stitching together multiple images. It’s ideal for capturing expansive landscapes or large groups of people.
- Square: This mode captures images in a square format, which is popular for social media platforms like Instagram.
- Video: This mode allows you to record videos in different resolutions and frame rates. You can also adjust settings like stabilization and slow motion.
- Slo-mo: This mode captures slow-motion video, perfect for capturing fast-paced action or capturing the beauty of everyday moments in slow motion.
- Time-lapse: This mode creates a sped-up video by capturing a series of images over time. It’s ideal for capturing the passage of time, like the movement of clouds or the blooming of flowers.
- Night Mode: This mode is designed for low-light situations, using longer exposure times to capture more light and detail. It produces brighter, clearer images in dimly lit environments.
Key Settings
The iPhone camera app offers a variety of settings that can be adjusted to improve image quality.
- Resolution: This setting determines the size of the image file. Higher resolutions result in larger files but also offer more detail and sharpness. The iPhone offers various resolutions, including 12MP and 16MP, depending on the model.
- ISO: This setting controls the camera’s sensitivity to light. Higher ISO settings are more sensitive to light, allowing you to capture images in darker conditions. However, higher ISO settings can also introduce noise (grain) into the image.
- Shutter Speed: This setting controls the amount of time the camera’s shutter remains open, allowing light to enter the sensor. Faster shutter speeds are used to freeze motion, while slower shutter speeds are used to capture motion blur.
- Aperture: This setting controls the size of the opening in the lens, which affects the depth of field. A wider aperture (lower f-number) creates a shallower depth of field, blurring the background and emphasizing the subject. A narrower aperture (higher f-number) creates a deeper depth of field, keeping both the foreground and background in focus.
Native iPhone Camera App vs. Third-Party Apps
The native iPhone camera app is a powerful tool that offers a wide range of features and settings. However, third-party apps can provide additional functionality and creative options.
- Native iPhone Camera App: The native app offers a simple and intuitive interface, making it easy to use for casual photographers. It also includes features like Live Photos, HDR, and Portrait mode. The app is also optimized for the iPhone’s hardware, ensuring optimal performance and image quality.
- Third-Party Apps: Third-party apps offer a wider range of features and settings, including manual controls over ISO, shutter speed, and aperture. Some apps also offer advanced features like RAW capture, time-lapse, and intervalometer functionality. However, third-party apps may require a learning curve and may not be as optimized for the iPhone’s hardware.
Composition Techniques for Landscape Photography
Composition is the art of arranging elements within a frame to create a visually appealing and impactful image. In landscape photography, composition is crucial for conveying the beauty and grandeur of nature. By applying various composition techniques, you can guide the viewer’s eye, enhance the subject’s prominence, and create a sense of balance and harmony.
Mastering the art of iPhone landscape photography is all about understanding composition and light, just like any other form of photography. But sometimes, you need a bit of extra help to truly elevate your skills. That’s where online resources and educational platforms come in handy, like the ones offered by Fortinet, who recently announced progress toward its mission to tackle the cybersecurity skills shortage here.
With the right tools and knowledge, you can capture breathtaking landscapes that truly showcase the beauty of our world.
The Rule of Thirds
The rule of thirds is a fundamental composition guideline that divides the frame into nine equal sections using two horizontal and two vertical lines. The points where these lines intersect are considered the most visually interesting areas of the frame.
By placing key elements, such as the horizon, a prominent landmark, or the subject of interest, along these lines or at the intersection points, you create a more dynamic and engaging composition.
- For instance, when photographing a mountain range, position the horizon line along the top or bottom third line, rather than centering it in the frame. This creates a sense of depth and space.
- Similarly, when photographing a lone tree in a field, place the tree at one of the intersection points to create a more balanced and visually pleasing composition.
Leading Lines
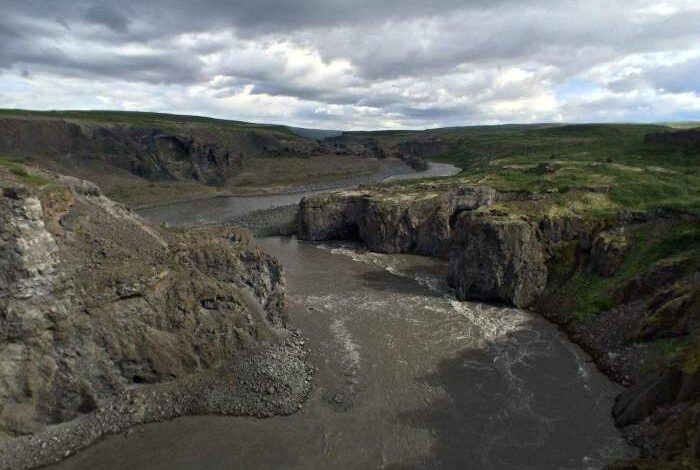
Leading lines are visual pathways that draw the viewer’s eye through the image. They can be natural elements, such as rivers, roads, or fences, or man-made structures, like buildings or bridges. By using leading lines, you can create a sense of depth, movement, and direction.
- For example, a winding road leading towards a distant mountain range can create a sense of journey and anticipation.
- Similarly, a river flowing through a landscape can guide the viewer’s eye towards the focal point of the image.
Framing
Framing is a technique that uses natural or man-made elements within the scene to create a frame around the subject. This can be achieved using trees, rocks, arches, or other objects. Framing adds depth and context to the image, making the subject stand out more prominently.
Mastering iPhone photography basics is like learning a new language. You need to understand the rules of composition, light, and exposure. And just like a good book, the best way to learn is to immerse yourself in the subject.
That’s why I love checking out at home with rhonda mason , which offers a great blend of photography tips and creative inspiration. Rhonda’s work is a reminder that even the simplest tools can be used to capture breathtaking landscapes.
- For example, a lone tree standing in front of a mountain range can frame the mountain, making it appear larger and more imposing.
- Similarly, a window or doorway can frame a view, adding a sense of intimacy and perspective.
Camera Angles and Perspectives
Choosing the right camera angle can significantly impact the composition of your landscape photograph. Experimenting with different angles, such as high, low, or eye-level, can change the perspective and create different visual effects.
- A high angle, achieved by shooting from a higher vantage point, can create a sense of scale and overview.
- A low angle, achieved by shooting from a lower vantage point, can make the subject appear larger and more imposing.
- An eye-level angle, achieved by shooting at eye level with the subject, creates a more natural and intimate perspective.
Mastering Light and Exposure

Light is the fundamental element in photography, and understanding its nuances is crucial for capturing stunning landscapes. The way light interacts with your subject dramatically impacts the final image, influencing its mood, atmosphere, and overall visual impact.
Types of Light and Their Effects
The quality of light significantly affects the outcome of your landscape photographs. The time of day, weather conditions, and even the direction of light all contribute to the overall feel of your image.
- Golden Hour:This period shortly after sunrise and before sunset is known for its warm, soft, and diffused light. The long shadows cast by the low sun create a dramatic and enchanting effect, making it ideal for capturing landscapes with a sense of warmth and depth.
- Blue Hour:This period just before sunrise and after sunset, characterized by cool, bluish hues, provides a unique and ethereal look. The soft, diffused light can create a calming and serene atmosphere, perfect for capturing landscapes with a sense of tranquility.
- Overcast Light:When the sky is covered with clouds, the light is diffused and evenly distributed. This type of light can be beneficial for landscape photography, as it reduces harsh shadows and creates a soft, balanced exposure. It’s great for capturing details and colors without the dramatic contrast of direct sunlight.
- Direct Sunlight:Direct sunlight, often encountered on a clear day, can create harsh shadows and high contrast. While it can be challenging to work with, it can also produce vibrant and dynamic images, particularly when used strategically to highlight textures and shapes.
- Artificial Light:City lights, street lamps, and other artificial light sources can create unique and interesting effects in landscape photography. They can add a sense of urbanity and drama to your images, especially when used in combination with natural light during twilight or nighttime.
Understanding Exposure Settings
The exposure settings on your iPhone camera control how much light reaches the sensor, ultimately determining the brightness and overall look of your photograph.
- ISO:ISO measures the sensitivity of your camera’s sensor to light. A higher ISO setting allows the sensor to capture more light, which is useful in low-light conditions. However, increasing ISO can also introduce noise (grain) into your images.
- Shutter Speed:This setting determines the length of time the camera’s shutter stays open, allowing light to enter the sensor. A faster shutter speed freezes motion, while a slower shutter speed allows more light to enter, blurring motion. For landscapes, you often want a slower shutter speed to capture a sense of movement in water, clouds, or other elements.
- Aperture:The aperture controls the size of the opening in the lens that allows light to pass through. A wider aperture (smaller f-number) lets in more light, creating a shallow depth of field, where the subject is sharp and the background is blurred.
Learning the basics of iPhone photography can open up a whole new world of creative possibilities, especially when it comes to capturing breathtaking landscapes. Mastering composition, light, and editing techniques is key, but don’t forget about the details! A fresh manicure can boost your confidence and inspire you to explore new angles, and I’ve been loving this gold stud manicure DIY lately.
It’s a subtle touch that adds a touch of glamour to my everyday style, just like a well-composed landscape photo can capture a moment of beauty in a simple scene.
A narrower aperture (larger f-number) lets in less light, creating a deeper depth of field, where everything in the scene is in focus. For landscapes, you typically want a smaller aperture (f/16 or smaller) to ensure maximum sharpness from foreground to background.
Achieving Proper Exposure
The goal is to capture an image that accurately represents the scene’s brightness and detail. Here are some techniques to help you achieve proper exposure:
- Using the Histogram:The histogram is a graph that shows the distribution of tones in your image. It helps you assess whether your image is properly exposed, underexposed, or overexposed. A balanced histogram with a peak in the middle indicates a well-exposed image.
- Exposure Compensation:Exposure compensation allows you to adjust the overall brightness of your image. You can use it to brighten or darken the image based on your desired effect or the specific lighting conditions. For example, you might increase exposure compensation in low-light situations or decrease it in bright sunlight.
- Bracketing:This technique involves taking multiple images of the same scene with different exposure settings. This allows you to have more flexibility in post-processing, ensuring you capture the details in both the highlights and shadows.
Capturing the Landscape’s Details: Iphone Photography Basics Become A Better Landscape Photographer
A sharp image is the foundation of a stunning landscape photograph. It brings out the intricate textures, the delicate details, and the captivating depth of the scene. When your photo is sharp, your viewer can truly feel immersed in the landscape, experiencing the same sense of awe and wonder that you felt when you captured it.
Focusing Techniques for Landscape Photography
Focusing techniques play a crucial role in achieving sharp images. Here’s a breakdown of different methods available on your iPhone:
- Autofocus: This is the default mode on your iPhone camera, automatically selecting the focus point. It’s great for quick shots, but for landscapes, manual control offers more precision.
- Tap-to-Focus: This allows you to choose the focus point by simply tapping on the screen. This is incredibly helpful for landscapes, as you can ensure the area of interest is perfectly sharp.
- Manual Focus: This advanced technique allows you to manually adjust the focus using the slider on the screen. It’s ideal for fine-tuning focus in complex scenes, achieving a specific depth of field, or focusing on distant objects.
Achieving Sharp Images
Several factors contribute to achieving sharp images in landscape photography. Here are some tips to keep in mind:
- Use a Tripod: A tripod provides stability, minimizing camera shake, especially when using slower shutter speeds. It’s a must-have for landscapes, allowing you to capture pin-sharp images even in low light.
- Adjust Shutter Speed: Shutter speed determines how long the camera shutter remains open. A faster shutter speed reduces the chance of camera shake, resulting in sharper images. For landscapes, you can often use slower shutter speeds, especially when using a tripod.
- Minimize Camera Shake: Even with a tripod, small movements can affect sharpness. Use the timer function or a remote shutter release to avoid touching the camera during exposure.
- Check Focus: After taking a photo, always check the focus on the screen. If the image is blurry, try adjusting the focus point or re-taking the photo.
Editing Your iPhone Landscape Photos
Capturing a stunning landscape photo is only half the battle. Editing is the final step that can truly elevate your images and bring out their full potential. Your iPhone comes equipped with a powerful built-in photo editor, but for more advanced adjustments, third-party apps offer a world of creative possibilities.
Editing with the iPhone Photos App
The iPhone Photos app offers a surprisingly robust set of editing tools, allowing you to make basic adjustments to your landscape photos. The iPhone Photos app provides tools for:* Brightness:Controls the overall lightness or darkness of the image.
Contrast
Enhances the difference between light and dark areas, making the image more vibrant.
Highlights
Adjusts the brightest areas of the image, preventing blown-out highlights.
Shadows
Adjusts the darkest areas of the image, bringing out detail in shadows.
Saturation
Controls the intensity of colors in the image.
Vibrance
Selectively increases the saturation of less saturated colors, preserving the natural tones of the image.
Sharpness
Enhances the detail and clarity of the image.
Warmth
Shifts the color temperature of the image towards warmer or cooler tones.
Tint
Adds a green or magenta hue to the image.
Crop
Adjusts the composition of the image by removing unwanted areas.
Straighten
Corrects any tilt or skew in the image.
Red-eye Removal
Removes red-eye from portraits.
Filters
Apply pre-designed filters to quickly change the look and feel of your image.
Third-Party Editing Apps
While the iPhone Photos app is a great starting point, third-party editing apps offer a wider range of tools and more control over your edits. Popular third-party editing apps include:* Snapseed:This free app provides a comprehensive suite of editing tools, including selective adjustments, healing, and perspective correction.
Adobe Lightroom Mobile
A powerful mobile version of the desktop software, offering advanced editing features and RAW file support.
VSCO
Known for its stylish filters and film emulation presets, VSCO also offers a wide range of editing tools.
ProCamera
A camera app that also includes a powerful editing suite with advanced features like RAW editing and focus stacking.
Tips for Editing Landscape Photos
Editing your landscape photos is an art form. Here are some tips to help you bring out the best in your images:* Start with Exposure:Adjust the overall brightness of the image to create a balanced exposure. Avoid overly bright or dark areas that can lose detail.
Enhance Contrast
Increase the contrast to create a more dramatic and visually appealing image.
Adjust Highlights and Shadows
Bring out detail in both the brightest and darkest areas of the image, ensuring that no information is lost.
Balance Color
Use the color balance tools to correct any color casts and achieve a natural-looking image.
Use Selective Adjustments
Target specific areas of the image for adjustments, such as brightening the sky or darkening the foreground.
Experiment with Filters
Explore different filters to find ones that complement your image and enhance its mood.
Sharpen Carefully
Sharpen your image subtly to enhance detail without introducing unwanted artifacts.
Save Your Edits
Save your edited images in a separate folder to keep your originals intact.
Exploring iPhone Landscape Photography Techniques

Now that you have a solid understanding of the basics, let’s delve into some advanced techniques that can elevate your iPhone landscape photography to the next level. These techniques involve using filters and lenses, capturing motion and movement, and exploring creative approaches to enhance the visual impact of your photos.
Using Filters and Lenses
Filters and lenses can significantly impact the look and feel of your landscape photos. They allow you to experiment with different effects, adjust the light, and create unique perspectives.
- Polarizing Filters:These filters reduce glare and reflections, enhancing the vibrancy of colors and revealing details in skies and water. They are particularly useful for capturing landscapes with bright sunlight.
- Neutral Density (ND) Filters:ND filters reduce the amount of light entering the lens, allowing you to use longer shutter speeds for capturing motion blur or creating silky smooth water effects in waterfalls or rivers.
- Wide-Angle Lenses:These lenses capture a wider field of view, making them ideal for expansive landscapes and emphasizing the scale of your subject.
- Telephoto Lenses:Telephoto lenses allow you to zoom in on distant subjects, bringing them closer and highlighting details that might otherwise be missed.