
Select External Drive for macOS Backups: A Comprehensive Guide
Select external drive macos backups – Selecting the right external drive for macOS backups is crucial for protecting your precious data. Whether you’re a seasoned Mac user or a newcomer, understanding the nuances of external drive backups can make a world of difference. This guide will delve into the essential aspects of choosing, configuring, and managing external drives for your macOS backups, ensuring your data is safe and easily recoverable.
From exploring the different types of external drives available to mastering the intricacies of Time Machine and manual backups, we’ll cover everything you need to know to safeguard your macOS system. We’ll also discuss data encryption, backup management strategies, and data restoration techniques, empowering you to confidently navigate the world of macOS backups.
Understanding External Drive Backups in macOS
Data loss can be a devastating event for any Mac user, potentially resulting in the loss of irreplaceable files, photos, and other critical information. To mitigate this risk, macOS provides robust backup solutions, with external drives playing a crucial role in safeguarding your data.
External Drive Backups: A Crucial Layer of Protection
Using an external drive for macOS backups offers several advantages over relying solely on Time Machine, the built-in backup solution. While Time Machine is effective for frequent incremental backups, using an external drive provides additional benefits, including:
- Increased Storage Capacity:External drives offer significantly larger storage capacities compared to Time Machine’s default destination, a local disk partition. This allows for complete system backups, including applications, user data, and system settings, ensuring a comprehensive data recovery solution.
- Flexibility and Control:External drives provide greater flexibility in choosing backup destinations and schedules. You can easily connect different drives for different backup purposes, like storing backups for specific projects or sensitive data on separate drives.
- Data Redundancy:Storing backups on external drives creates an off-site backup, safeguarding your data against local disasters like fire, theft, or hard drive failure. This redundancy ensures data recovery even if your primary Mac is compromised.
Types of External Drives for macOS Backups
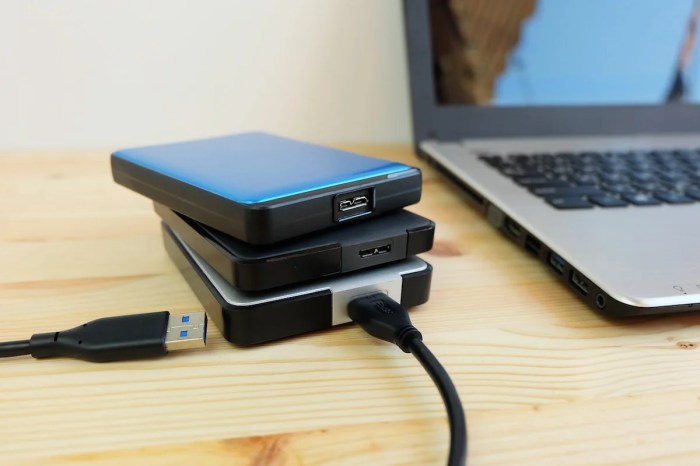
The choice of external drive for macOS backups depends on your specific needs and budget. Here are some popular options:
- External Hard Drives:These are the most common and affordable option, offering ample storage capacity for full system backups. They are typically slower than SSDs but provide reliable data storage.
- External Solid-State Drives (SSDs):SSDs offer significantly faster data transfer speeds compared to hard drives, making them ideal for frequent backups and large file transfers. However, they are generally more expensive than hard drives.
- Network Attached Storage (NAS):NAS devices provide centralized storage for multiple devices on a network. They offer high capacity, security features, and remote access capabilities, making them suitable for large backups and data sharing.
- Cloud Storage Services:Cloud storage services like iCloud, Dropbox, or Google Drive offer convenient online backups, accessible from multiple devices. They provide flexibility and remote access but might incur monthly subscription fees.
Choosing the Right External Drive

Choosing the right external drive for your macOS backups is crucial for ensuring your data’s safety and accessibility. This decision involves several factors, each playing a significant role in the overall effectiveness of your backup strategy.
Storage Capacity
The amount of storage space you need depends on the size of your data. Consider the size of your hard drive, the amount of data you create regularly, and how long you want to keep backups. A good rule of thumb is to have at least twice the storage space of your internal hard drive, but you may need more depending on your needs.
Speed
The speed of your external drive affects how quickly backups are created and restored. Faster drives, like those with Thunderbolt or USB-C interfaces, can significantly reduce backup times, especially for large files. Slower drives, like USB 2.0 drives, can take much longer, making them less ideal for frequent backups.
Selecting the right external drive for your macOS backups is crucial for peace of mind. You want something reliable and spacious, and it’s always a good idea to have a backup strategy in place. Speaking of storage, have you considered try this hanging baskets for bathroom storage to maximize space in your bathroom?
They’re a clever solution for toiletries and towels. Back to backups, remember to test your backups regularly to ensure they’re working as intended.
Interface
The interface of your external drive determines how it connects to your Mac. Common interfaces include:
- Thunderbolt:The fastest interface, offering speeds up to 40 Gbps, making it ideal for large files and frequent backups.
- USB-C:A versatile interface with speeds up to 10 Gbps, suitable for most users.
- USB 3.0:A common interface with speeds up to 5 Gbps, offering a good balance of speed and affordability.
- USB 2.0:The slowest interface, with speeds up to 480 Mbps, best suited for smaller files and infrequent backups.
Durability
Durability is crucial for an external drive, especially if you plan to move it around or use it in harsh environments. Look for drives with shock-resistant cases, rugged enclosures, and features like drop protection. Some drives are also water-resistant or dust-proof, offering additional protection.
Types of External Drives
There are various types of external drives available, each with its strengths and weaknesses:
- Hard Disk Drives (HDDs):HDDs are the most affordable option, offering high storage capacities. However, they are more susceptible to damage and slower than SSDs.
- Solid State Drives (SSDs):SSDs are faster, more durable, and quieter than HDDs, making them ideal for frequent backups. However, they are typically more expensive and have lower storage capacities than HDDs.
- Network Attached Storage (NAS):NAS devices offer centralized storage and access for multiple users. They are ideal for large families or businesses, but they can be more complex to set up and manage.
Formatting Your External Drive, Select external drive macos backups
Before using an external drive for macOS backups, you need to format it properly. Here’s how:
- Connect your external drive to your Mac.
- Open Disk Utility.You can find it in the Applications > Utilities folder.
- Select your external drive in the sidebar.
- Click the “Erase” button.
- Choose a name for your drive.
- Select “Mac OS Extended (Journaled)” as the format.This is the recommended format for macOS backups.
- Click the “Erase” button to confirm.
Configuring Backups on macOS

macOS offers a range of backup options to safeguard your valuable data. You can choose from automated solutions like Time Machine, which creates regular backups of your entire system, or manual backups, which provide greater control over specific files and folders.
Time Machine Backups
Time Machine is Apple’s built-in backup solution, providing a simple and effective way to restore your system to a previous state. It creates incremental backups, saving only the changes made since the last backup, making it efficient and space-saving. To configure Time Machine backups, follow these steps:
- Connect an external drive: Ensure your external drive is formatted as Mac OS Extended (Journaled) or APFS.
- Open Time Machine preferences: Go to System Preferences > Time Machine.
- Select your external drive: Click “Select Disk” and choose the drive you want to use for backups.
- Start backups: Time Machine will automatically start backing up your system. You can customize backup frequency and other settings in the Time Machine preferences.
Manual Backups
Manual backups allow you to selectively choose specific files and folders for backup. This method provides greater control over the backup process, allowing you to prioritize important data and avoid backing up unnecessary files.
- Choose the files or folders you want to back up: Locate the files or folders you want to back up on your Mac.
- Copy the files or folders to your external drive: Drag and drop the selected files or folders to the desired location on your external drive.
- Organize your backup files: Create folders on your external drive to organize your backups and ensure easy retrieval.
Managing and Maintaining Backups

Having a robust backup strategy is essential, but it’s not enough to just set it and forget it. Regularly managing and maintaining your backups is crucial to ensure their effectiveness and safeguard your data.
Organizing Backup Files
Organizing your backup files effectively can make navigating your backups easier and faster. You can create a folder structure that reflects your computer’s file organization. For example, you could create folders for Documents, Applications, Music, and Photos, and then further sub-folders within each category.
This makes finding specific files during a restore process much simpler.
Keeping your Mac’s data safe is crucial, and external drives are a great way to create backups. While I’m focused on securing my digital life, I can’t help but be tempted by the latest deals, especially when it comes to lingerie.
If you’re looking for some stylish updates to your wardrobe, check out hunkemoller uk new and upcoming offers – they often have great discounts! Once you’ve treated yourself, you can return to the task at hand and ensure your Mac’s precious data is well protected.
Verifying Backup Integrity
Verifying the integrity of your backups ensures that they are accurate and can be restored successfully. macOS offers built-in tools for verifying backups:
- Disk Utility:Use Disk Utility to check the external drive for errors, ensuring its physical integrity. This is crucial for data recovery in case of drive failure.
- Time Machine:Time Machine’s “Verify Backup” feature allows you to check the consistency of your backups. This can identify any corrupt or missing files, giving you the opportunity to fix them before a restore is needed.
Optimizing Backup Performance
Optimizing backup performance can save you time and resources. Here are some strategies:
- Optimize Your External Drive:Choose a fast external drive with a large enough capacity to accommodate your data. Using a USB 3.0 or Thunderbolt connection can significantly boost transfer speeds.
- Schedule Backups:Setting up regular backups can prevent data loss in case of a system crash or hardware failure. You can configure Time Machine to back up hourly, daily, or weekly, depending on your needs.
- Exclude Unnecessary Files:Time Machine can be configured to exclude specific files or folders from backups. This can help reduce backup time and storage space usage, especially if you have large files like video games or movies that you don’t need to back up regularly.
Keeping your Mac’s data safe is crucial, and backing up to an external drive is a simple way to do it. While I’m on the topic of creating things, I’m also trying to perfect my cake decorating skills, and I’ve been practicing how to pipe frosting ruffles.
It’s amazing how much detail you can add with a simple piping bag! But back to the topic of backups, I’m happy to have my Mac’s data safely stored on my external drive. It’s a great feeling knowing I can easily recover my files if anything happens to my computer.
Minimizing Storage Space Usage
Managing storage space effectively is important, especially when using external drives.
- Compress Files:Compressing files before backing them up can significantly reduce storage space usage. macOS offers built-in compression tools, or you can use third-party compression software.
- Delete Old Backups:Time Machine keeps multiple versions of your backups, allowing you to restore your system to a previous state. However, this can consume significant storage space. You can delete older backups to free up space, but ensure you keep enough versions to meet your recovery needs.
Restoring Data from Backups: Select External Drive Macos Backups
Having a reliable backup strategy is crucial for protecting your data. However, the true value of a backup lies in your ability to restore your data when needed. This section delves into the process of restoring data from Time Machine backups and manual backups, providing you with the knowledge to retrieve your valuable files and folders.
Restoring Data from Time Machine Backups
Time Machine offers a convenient and intuitive way to restore your data. It allows you to restore your entire system to a previous state or selectively restore individual files and folders.Time Machine automatically creates incremental backups, saving only the changes made since the last backup.
This efficient approach ensures that your backups are manageable in size and allow for quick restoration. To restore data from Time Machine backups, follow these steps:
1. Connect your backup drive
Plug in the external drive containing your Time Machine backups.
2. Open Time Machine
Click the Time Machine icon in the menu bar or access it through System Preferences.
3. Select the backup point
Use the timeline to navigate to the desired backup point.
4. Choose the restoration method
You can either restore your entire system or select specific files and folders.
5. Follow the on-screen instructions
Time Machine will guide you through the restoration process.
Restoring Data from Manual Backups
Manual backups offer flexibility and control, allowing you to choose specific files and folders to back up. However, restoring data from manual backups requires a bit more effort than using Time Machine.To restore data from a manual backup, you need to copy the backed-up files and folders to their original location.
This process can be time-consuming, especially if you have a large amount of data to restore. Here’s a step-by-step guide:
1. Connect the backup drive
Plug in the external drive containing your manual backup.
2. Locate the backup files
Open the backup drive and navigate to the folder containing your backed-up files and folders.
3. Copy the files and folders
Select the files and folders you want to restore and copy them to their original location on your Mac.
4. Overwrite existing files
If you are restoring files that already exist on your Mac, you will be prompted to overwrite them.
Troubleshooting Data Restoration Issues
Data restoration can sometimes be a challenging process. Here are some common issues you might encounter and how to troubleshoot them:
- Backup drive not recognized:Ensure that the backup drive is properly connected and formatted. Check the drive’s permissions and make sure it’s not corrupted.
- Time Machine backup inaccessible:Verify that Time Machine is enabled and configured correctly. Check the backup drive’s connection and ensure it has enough free space.
- Data corruption:If the data is corrupted during the restoration process, try restoring from a different backup point. If the issue persists, consider using data recovery software.
- Files not found:Make sure you are looking for the files in the correct location. If you are restoring from a manual backup, double-check the backup folder structure.
Security and Data Protection
Your external drive backups are a crucial part of your data security strategy. But what happens if your drive falls into the wrong hands, or if your computer is compromised? This is where encryption and physical protection come into play.
Encrypting External Drives
Data encryption is a vital step in securing your backups. Encryption scrambles your data, making it unreadable without the correct decryption key. This prevents unauthorized access, even if your drive is lost or stolen.
“Encryption is like putting a lock on your data, and the decryption key is the only way to unlock it.”
Here’s how to encrypt an external drive in macOS:* Using Disk Utility:
Connect your external drive to your Mac.
Open Disk Utility (Applications > Utilities > Disk Utility).
Select your external drive in the sidebar.
Click the “Erase” button.
Choose a name for your drive, select “Mac OS Extended (Journaled)” as the format, and check the “Encrypt” box.
Enter and confirm a strong password for your encrypted drive.
Click “Erase” to begin the encryption process.
* Using FileVault:
FileVault is a built-in macOS encryption tool.
Open System Preferences > Security & Privacy > FileVault.
Click the “Turn On FileVault” button.
Follow the on-screen instructions to encrypt your entire system drive, including any external drives you have mounted.
Protecting Backups from Physical Damage or Loss
Physical protection is just as important as encryption. Here are some steps to safeguard your backups:* Use a high-quality external drive:Choose a drive known for its reliability and durability.
Store backups in a safe location
Keep your backups in a secure place, away from potential hazards like fire, water, or theft.
Create multiple backups
Store backups on multiple drives or in the cloud for added redundancy.
Regularly check your backups
Ensure your backups are working correctly by periodically testing your restore process.