
Create Windows 11 VM with VMware Workstation Player
Create windows 11 vm vmware workstation player – Create Windows 11 VM with VMware Workstation Player sets the stage for this enthralling narrative, offering readers a glimpse into a story that is rich in detail and brimming with originality from the outset. Virtual machines, a powerful tool for software development and testing, allow you to run different operating systems simultaneously on a single computer.
VMware Workstation Player, a popular virtualization software, provides a user-friendly platform for creating and managing these virtual environments. This guide will take you through the process of setting up a Windows 11 virtual machine on your system, from the initial setup to optimizing its performance for development and testing.
We’ll delve into the essential prerequisites, explore the step-by-step creation process, and uncover valuable tips for enhancing the VM’s performance. By the end, you’ll have a solid understanding of how to leverage the power of virtual machines to streamline your workflow and unlock new possibilities in software development and testing.
Understanding Virtual Machines and VMware Workstation Player

Virtual machines (VMs) are software-based simulations of physical computers. They allow you to run multiple operating systems simultaneously on a single physical machine, offering numerous benefits for software development, testing, and other tasks.
VMware Workstation Player Features and Benefits
VMware Workstation Player is a powerful virtualization software that enables you to create and run virtual machines on your computer. It provides a user-friendly interface and a wide range of features that make it an ideal choice for both beginners and experienced users.
- Creating and Managing Virtual Machines:VMware Workstation Player simplifies the process of creating virtual machines. You can easily install operating systems, configure network settings, and manage virtual machine resources. The software also provides tools for taking snapshots, cloning virtual machines, and recovering from failures.
- Hardware Compatibility:VMware Workstation Player supports a wide range of hardware configurations, including different CPU architectures, memory capacities, and storage devices. This allows you to run various operating systems and applications in a virtual environment.
- Performance Optimization:VMware Workstation Player utilizes hardware acceleration technologies to enhance the performance of virtual machines. This ensures that virtual machines run smoothly and efficiently, providing a near-native experience.
- Security Features:VMware Workstation Player includes security features such as password protection, virtual machine isolation, and network security settings. These features help to protect your virtual machines from unauthorized access and malicious attacks.
- Cost-Effective Solution:VMware Workstation Player is a cost-effective solution for virtualization, especially for individuals and small businesses. It offers a free version with basic features, while the paid version provides advanced capabilities.
Comparison with Other Virtualization Software
VMware Workstation Player competes with other virtualization software options, such as Oracle VirtualBox, Parallels Desktop, and Microsoft Hyper-V. While each software has its strengths and weaknesses, VMware Workstation Player stands out for its user-friendliness, robust features, and compatibility with a wide range of operating systems and hardware.
- Oracle VirtualBox:VirtualBox is a free and open-source virtualization software known for its simplicity and wide platform support. However, it may lack some advanced features found in VMware Workstation Player.
- Parallels Desktop:Parallels Desktop is a commercial virtualization software primarily designed for macOS users. It offers seamless integration with macOS and excellent performance, but it can be expensive compared to other options.
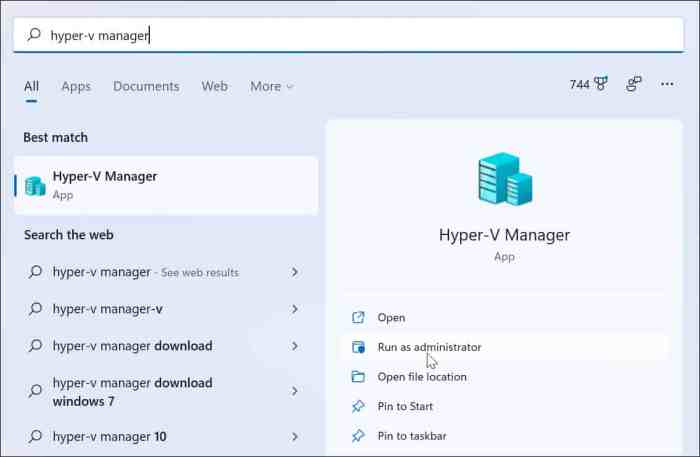
- Microsoft Hyper-V:Hyper-V is a built-in virtualization solution available in Windows Server and certain editions of Windows. It provides robust features and tight integration with Windows, but it is only available on specific Windows versions.
Prerequisites for Creating a Windows 11 VM
Before embarking on the journey of creating a Windows 11 virtual machine using VMware Workstation Player, it’s crucial to ensure you have the necessary prerequisites in place. These prerequisites encompass both system requirements and essential software and hardware components.
System Requirements for VMware Workstation Player
Meeting the minimum system requirements for VMware Workstation Player is essential for smooth operation and efficient VM creation. These requirements dictate the minimum hardware resources needed to run the software effectively.
- Processor:Intel or AMD processor with support for virtualization technology (Intel VT-x or AMD-V). This technology allows the processor to efficiently allocate resources to virtual machines.
- Memory (RAM):2 GB of RAM is the minimum recommended, but having at least 4 GB is highly suggested for a better experience, especially if you plan to run resource-intensive applications within the VM.
- Hard Disk Space:At least 10 GB of free disk space is required for VMware Workstation Player and the virtual machine files. The actual space needed will vary depending on the operating system and applications installed within the VM.
- Operating System:Windows 7 (64-bit) or later, macOS 10.13 (High Sierra) or later, or a Linux distribution with a 64-bit kernel are supported. This ensures compatibility and proper functionality of VMware Workstation Player.
Necessary Software and Hardware Components
Beyond the system requirements, specific software and hardware components are needed for a successful Windows 11 VM creation. These components play a crucial role in the entire process, from downloading the required software to ensuring proper hardware connectivity.
- VMware Workstation Player:This software is the core tool for creating and running virtual machines. Download and install the latest version from the official VMware website.
- Windows 11 ISO Image:This image file contains the necessary installation files for Windows 11. You can obtain it from Microsoft’s official website. Downloading the ISO image is the first step towards installing Windows 11 within the VM.
- Sufficient Storage Space:The virtual hard disk (VHD) file for the VM will require considerable storage space. Allocate enough space based on your anticipated usage and the size of the operating system and applications you plan to install. The recommended size for a Windows 11 VM is around 60 GB, but you can adjust it based on your needs.
- Internet Connection:A reliable internet connection is necessary for downloading the necessary software and for the initial setup of the Windows 11 VM. This connection will be crucial for downloading updates and installing applications within the VM as well.
Obtaining a Windows 11 ISO Image
The Windows 11 ISO image is the foundation for installing the operating system within the VM. Obtaining this image is a straightforward process.
- Visit the Microsoft Website:Go to the official Microsoft website and navigate to the Windows 11 download page. This page will provide the latest version of the ISO image.
- Select the Correct Version:Choose the version of Windows 11 that aligns with your needs. Consider factors like language, edition (Home, Pro, etc.), and the architecture (64-bit or 32-bit).
- Download the ISO Image:Once you’ve made your selection, click on the download button to initiate the download process. The ISO image file will be saved to your computer, ready for use in the VM creation process.
Creating a Windows 11 VM in VMware Workstation Player: Create Windows 11 Vm Vmware Workstation Player
Creating a Windows 11 virtual machine (VM) using VMware Workstation Player is a straightforward process that allows you to run Windows 11 in a virtualized environment. This is useful for various purposes, such as testing software, running legacy applications, or exploring the Windows 11 operating system without affecting your host machine.
Launching VMware Workstation Player and Creating a New Virtual Machine
To begin, launch VMware Workstation Player. Once launched, click on “Create a New Virtual Machine” to start the process. This action initiates the wizard that guides you through the creation of your virtual machine.
Selecting the Installation Source
The next step is to select the installation source for Windows
11. You have two options
- Use an installation disc:This option allows you to use an existing Windows 11 installation disc or USB drive. Insert the media into your host machine, and VMware Workstation Player will automatically detect it. This is suitable for installing Windows 11 from a physical media source.
- Use an ISO image file:Alternatively, you can use an ISO image file of Windows 11. This option is suitable for installing Windows 11 from a downloaded ISO file. You can browse your computer to locate the ISO image file.
Once you’ve selected your installation source, click “Next” to proceed.
Naming the Virtual Machine and Specifying the Location
The next step involves naming your virtual machine and choosing a location to store it. You can choose any name you prefer for the VM, but it’s recommended to keep it descriptive. You can also specify a different location for the VM files if needed.
Choosing the Virtual Machine Disk Size
This step is crucial for allocating disk space for your virtual machine. The recommended disk size depends on your intended usage and the size of the applications and data you plan to store on the VM. It’s always advisable to allocate sufficient disk space to avoid running out of space later.
Configuring the Virtual Machine Settings
Once you’ve completed the initial steps, you’ll be presented with the virtual machine settings window. This window allows you to customize various aspects of your VM, including:
CPU Cores
The number of CPU cores allocated to the VM directly impacts its performance. You can assign a specific number of CPU cores to the VM from the available cores on your host machine. Assigning more cores generally leads to faster performance, but it’s essential to consider the resources available on your host machine.
RAM Allocation
Similar to CPU cores, RAM allocation affects the VM’s performance. You can allocate a specific amount of RAM from your host machine’s total RAM. Allocating more RAM can improve performance, but it’s crucial to ensure sufficient RAM remains available for your host machine’s operations.
Hard Disk Size
The hard disk size determines the total storage space available for your virtual machine. It’s crucial to allocate enough disk space to accommodate your applications and data. You can choose a fixed size or dynamically allocate space as needed.
Installing Windows 11 in the Virtual Machine, Create windows 11 vm vmware workstation player
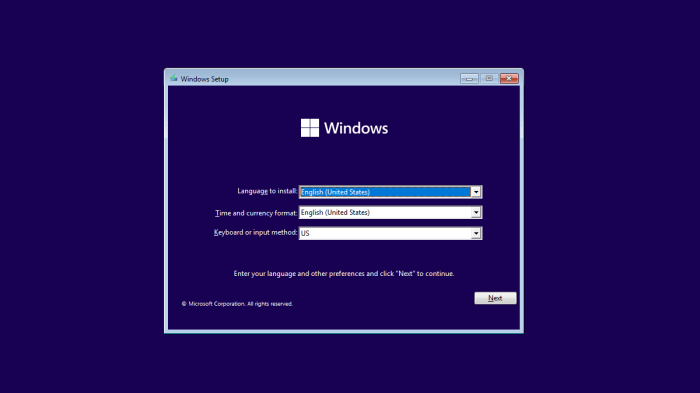
After configuring the VM settings, you’ll be prompted to start the virtual machine. The virtual machine will boot up, and you’ll be presented with the Windows 11 installation screen. Follow the on-screen instructions to install Windows 11 within the virtual machine.The installation process is similar to installing Windows 11 on a physical machine.
You’ll be asked to accept the license agreement, choose a partition for installation, and configure basic settings.
Connecting to the Internet
Once Windows 11 is installed, you’ll need to connect the virtual machine to the internet. You can configure network settings within the virtual machine’s settings or use the built-in network adapter options provided by Windows 11.
Installing Drivers and Software
After connecting to the internet, you can install any necessary drivers and software for your virtual machine. This includes drivers for your graphics card, sound card, and other peripherals. You can also install any applications you need for your specific use case.
Customizing the Virtual Machine
After installing Windows 11 and any necessary drivers and software, you can further customize your virtual machine. This includes changing the display resolution, setting up shared folders for file sharing, and configuring other settings according to your preferences.
Troubleshooting
If you encounter any issues during the process, refer to VMware Workstation Player’s documentation or online resources for troubleshooting guides. Common issues include compatibility problems, driver conflicts, and network connectivity problems.
Using the Windows 11 VM for Development and Testing

Creating a Windows 11 VM with VMware Workstation Player opens up a world of possibilities for software development and testing. You can use it to test your applications in a controlled environment, isolate them from your host machine, and experiment with different configurations without affecting your main system.
Accessing Shared Folders and Resources
Sharing folders and resources between the host machine and the VM is essential for development and testing. This allows you to easily access project files, libraries, and other resources from both environments. VMware Workstation Player provides a seamless way to achieve this.
- Shared Folders:VMware Workstation Player allows you to create shared folders that are accessible from both the host machine and the VM. This is done through the “Shared Folders” settings within the VM’s configuration. You can choose specific folders from your host machine to be shared with the VM, making your project files readily available.
- Network Access:You can also configure the VM’s network settings to allow it to access resources on your local network. This allows you to connect to databases, web servers, and other services running on your host machine or other devices on your network.
Virtual Networking for Simulated Environments
Virtual networking is a powerful feature that allows you to create and manage different network environments within your VM. This is invaluable for testing applications that require specific network configurations or for simulating real-world scenarios.
- Network Isolation:You can isolate your VM from your host machine’s network, creating a completely separate network environment. This is useful for testing applications that might be affected by network connectivity or for preventing your VM from accessing the internet.
- Network Bridging:This mode allows your VM to connect to the same network as your host machine, providing access to the internet and other devices on your network. This is suitable for applications that need to interact with other devices on the same network.
- NAT (Network Address Translation):NAT provides a private network for your VM, allowing it to access the internet while hiding its IP address from external networks. This is a common setup for development and testing, as it provides a secure and isolated environment for your applications.
Troubleshooting and Best Practices
Creating and using a Windows 11 VM in VMware Workstation Player can be a seamless experience, but there are situations where you might encounter issues. This section will discuss common problems and provide troubleshooting tips, along with best practices to ensure the stability and performance of your Windows 11 VM.
Common Issues and Troubleshooting
Troubleshooting is an essential part of working with virtual machines. Identifying and resolving issues effectively can significantly improve your overall experience.
VM Startup Issues
VM startup issues can be frustrating, but understanding the common causes can help you diagnose and resolve them.
- Insufficient Resources:Ensure your host machine has enough RAM, CPU cores, and storage space for the VM to operate smoothly. If resources are limited, the VM might struggle to start or run efficiently.
- Network Connectivity Problems:Verify your network settings within the VM and the host machine. If the network adapter is not configured correctly, the VM might fail to connect to the internet or other network resources.
- Corrupted Virtual Disk:A corrupted virtual disk can prevent the VM from starting. Run the VMware Workstation Player’s built-in repair tool to try and fix the disk.
- VMware Workstation Player Issues:Occasionally, issues with VMware Workstation Player itself can hinder VM startup. Update the software to the latest version or try reinstalling it.
Performance Problems
Slow performance can be a major annoyance. Several factors can contribute to this, and addressing them can improve your VM’s responsiveness.
- Insufficient Resources:Allocate more RAM, CPU cores, or storage space to the VM.
- High Disk Usage:Monitor disk usage within the VM and consider increasing the virtual disk size or optimizing the storage settings.
- Background Processes:Close unnecessary applications and processes running on the host machine and within the VM to free up resources.
- Outdated Drivers:Update the VM’s drivers, especially for graphics and network adapters, to ensure optimal performance.
Best Practices for Maintaining VM Stability and Performance
Implementing best practices can significantly enhance the stability and performance of your Windows 11 VM.
Regular Updates
Keeping your VM and host machine software up-to-date is crucial for security and performance.
- VMware Workstation Player Updates:Regularly check for and install updates for VMware Workstation Player. Updates often include performance enhancements, bug fixes, and security patches.
- Windows 11 Updates:Ensure that your Windows 11 VM is up-to-date with the latest Windows updates. These updates address security vulnerabilities, improve performance, and provide new features.
- Driver Updates:Regularly check for and install updates for the VM’s drivers, especially for graphics and network adapters. Updated drivers can enhance performance and address compatibility issues.
Resource Management
Optimizing resource allocation is essential for maintaining a stable and performant VM.
- RAM Allocation:Allocate sufficient RAM to the VM. Consider the VM’s intended use and the resources required by the applications you plan to run.
- CPU Cores:Assign enough CPU cores to the VM. More cores generally result in better performance, especially for CPU-intensive tasks.
- Storage Space:Ensure that the virtual disk has enough space for the VM’s operating system, applications, and data.
Snapshot Management
Snapshots are essential for reverting to a previous state, but excessive use can impact performance.
- Snapshot Creation:Create snapshots before making significant changes to the VM, such as installing new software or configuring settings.
- Snapshot Deletion:Regularly delete unnecessary snapshots to reduce the VM’s disk usage and improve performance.
- Snapshot Consolidation:Periodically consolidate snapshots to optimize disk space and improve performance.