
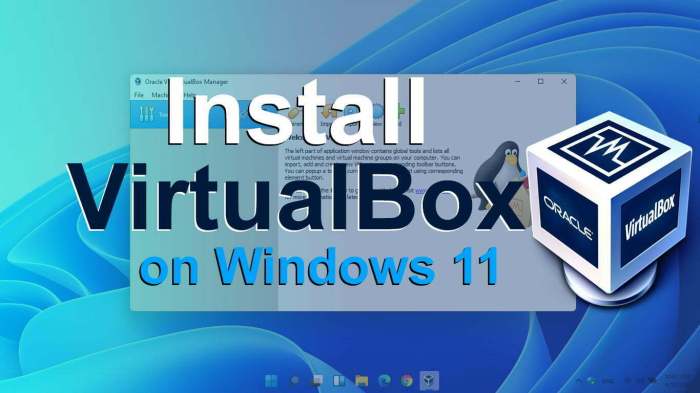
Deploy Windows 11 in VirtualBox: A Comprehensive Guide
Deploy windows 11 virtualbox – Deploying Windows 11 in VirtualBox opens up a world of possibilities for developers, testers, and anyone who wants to experience the latest Windows operating system without affecting their primary system. This setup provides a safe and isolated environment to explore new features, run applications, and even test out different configurations without impacting your main operating system.
VirtualBox, a powerful virtualization software, allows you to create virtual machines, essentially computers within your computer, that can run different operating systems, including Windows 11. This guide will walk you through the entire process, from downloading VirtualBox and obtaining a Windows 11 ISO file to installing and configuring your virtual machine.
We’ll cover essential aspects like system requirements, network settings, and troubleshooting tips to ensure a smooth and successful deployment.
Creating a Virtual Machine

Creating a virtual machine (VM) in VirtualBox allows you to run different operating systems within your existing computer. This is useful for testing software, exploring new operating systems, or even running older software that might not be compatible with your current system.
Creating a New Virtual Machine
To create a new VM in VirtualBox, follow these steps:
- Open VirtualBox and click the “New” button.
- In the “Create Virtual Machine” wizard, enter a name for your VM and select the type of operating system you want to install.
- Choose the amount of RAM you want to allocate to the VM. The amount of RAM you choose will affect the performance of the VM, so it’s important to choose a reasonable amount. For a basic system, 2 GB of RAM is usually sufficient.
For more demanding applications, you may need to allocate more RAM.
- Choose whether to create a virtual hard drive now or later. Creating a virtual hard drive now will create a file that stores the VM’s data. This file can be resized later if needed.
- Select the type of virtual hard drive you want to create. The default “VDI” format is a good choice for most users.
- Choose a size for the virtual hard drive. The size of the virtual hard drive will determine how much space the VM can use. It’s important to choose a size that is large enough to accommodate the operating system and any applications you plan to install.
- Click “Create” to create the VM.
Configuring Virtual Machine Settings
Once the VM is created, you can configure its settings. This includes settings for the virtual hard drive, network, and other components.
Virtual Hard Drive Settings
- You can configure the virtual hard drive’s size and type.
- You can also choose to create a dynamically allocated hard drive, which will only take up space on your physical hard drive as it is used. This can save space on your hard drive, but it may result in slower performance.
Network Settings
- You can choose to connect the VM to the host computer’s network using a bridged adapter, a NAT adapter, or a host-only adapter.
- A bridged adapter will allow the VM to access the host computer’s network as if it were a separate physical computer.
- A NAT adapter will allow the VM to access the internet but will not allow other devices on the network to access the VM.
- A host-only adapter will create a private network between the host computer and the VM.
Other Settings
- You can also configure other settings for the VM, such as the number of CPU cores to allocate, the amount of video memory to use, and whether to enable USB support.
- These settings will affect the performance of the VM, so it’s important to choose settings that are appropriate for the intended use case.
Choosing Appropriate Settings
- When choosing settings for your VM, it’s important to consider the intended use case.
- For example, if you’re planning to use the VM to test software, you may want to allocate more RAM and CPU cores.
- If you’re planning to use the VM to run a lightweight operating system, you may be able to get away with allocating less RAM and CPU cores.
- It’s also important to consider the amount of space available on your hard drive. If you’re planning to install a large operating system, you’ll need to allocate a larger virtual hard drive.
Configuration and Optimization
Once your Windows 11 virtual machine is up and running, you’ll want to configure and optimize it for the best performance. This involves adjusting settings, installing drivers, and potentially tweaking some system configurations.
Optimizing Virtual Machine Performance
Optimizing your virtual machine performance is crucial for a smooth and responsive experience. You can achieve this by adjusting the allocated resources and making sure your virtual machine has access to enough RAM, CPU cores, and storage space. Here are some tips to optimize your virtual machine’s performance:
- Allocate more RAM: Windows 11 requires a minimum of 4GB of RAM, but allocating more RAM to your virtual machine will significantly improve its performance, especially if you plan to run resource-intensive applications.
- Assign more CPU cores: You can allocate more CPU cores to your virtual machine, giving it more processing power. This is particularly useful if you’re running demanding tasks or multiple applications simultaneously.
- Use a fast storage drive: The speed of your virtual machine’s storage drive significantly impacts its performance. Consider using a fast SSD or NVMe drive for your virtual hard disk to achieve better read and write speeds.
- Enable hardware acceleration: Enabling hardware acceleration in VirtualBox allows your virtual machine to leverage the host computer’s graphics processing unit (GPU), which can significantly improve the performance of graphics-intensive applications.
- Disable unnecessary services and applications: You can disable unnecessary services and applications running in the background to free up resources and improve your virtual machine’s performance. This is particularly helpful if you’re running an older computer with limited resources.
Configuring Network Settings
Connecting your virtual machine to the internet is essential for accessing online resources, downloading software, and staying up-to-date. VirtualBox provides various network settings to achieve this, including NAT, Bridged, and Host-only networking.
- NAT (Network Address Translation): This is the default setting in VirtualBox. It allows your virtual machine to access the internet through the host computer’s network connection. NAT hides your virtual machine’s IP address from the outside world, making it a more secure option.
- Bridged Networking: This setting allows your virtual machine to connect directly to your network and have its own IP address. It’s a more advanced option, but it provides more flexibility and control over network settings.
- Host-only Networking: This option creates a private network between your host computer and the virtual machine. It’s useful for testing applications or setting up a private network environment.
Installing and Configuring Drivers and Software
After installing Windows 11 on your virtual machine, you might need to install specific drivers and software to ensure all hardware components function correctly. This might include drivers for your virtual machine’s network adapter, graphics card, and other peripherals.
- Install Guest Additions: VirtualBox Guest Additions is a set of drivers and tools that enhance the integration between the host computer and the virtual machine. They improve performance, provide seamless clipboard sharing, and enable other features.
- Install necessary drivers: You might need to download and install specific drivers for your virtual machine’s hardware components, such as the network adapter, graphics card, and sound card. These drivers can be obtained from the manufacturer’s website or from VirtualBox’s website.
- Install essential software: Install essential software like antivirus, browser, and productivity tools to make your virtual machine fully functional.
Advanced Features: Deploy Windows 11 Virtualbox
VirtualBox offers a range of advanced features that enhance the functionality and flexibility of your virtual machines. These features allow you to tailor your virtual environment to specific needs, enabling seamless integration with your host system and advanced networking capabilities.
Shared Folders, Deploy windows 11 virtualbox
Shared folders provide a convenient way to share files between the host and guest operating systems. This eliminates the need for tedious file transfers and enables seamless collaboration between the host and guest environments.
- Creating Shared Folders:You can create shared folders within the VirtualBox settings of your virtual machine. This involves specifying a folder on the host system that you want to share with the guest. The shared folder is then mounted as a drive within the guest operating system, making it accessible for reading and writing.
- Accessing Shared Folders:Once a shared folder is created, you can access it from within the guest operating system. The location of the shared folder may vary depending on the guest operating system. In most cases, you can find the shared folder under the “Network” or “Computer” sections.
- Permissions and Security:You can configure permissions for shared folders, allowing you to control who has access to the shared files. This ensures that sensitive data remains protected.
Virtual Machine Networking Options
VirtualBox provides a variety of networking options that allow you to connect your virtual machine to the network in different ways, depending on your specific requirements.
- NAT (Network Address Translation):This is the default networking option, which isolates the virtual machine from the host network and provides internet access through the host system’s network connection. NAT allows the virtual machine to access the internet but prevents other devices on the network from directly accessing the virtual machine.
- Bridged Networking:Bridged networking connects the virtual machine directly to the host’s network, allowing it to be seen as a separate device on the network. This allows the virtual machine to communicate with other devices on the network, just like a physical machine.
- Host-only Networking:This option creates a private network between the virtual machine and the host system. This allows communication between the virtual machine and the host, but not with other devices on the network. Host-only networking is often used for testing and development purposes, where isolation from the external network is desired.
VirtualBox Extensions
VirtualBox extensions provide a wide range of advanced features that enhance the functionality of your virtual machines. These extensions are available as separate packages and can be installed within the VirtualBox Manager.
- Guest Additions:Guest Additions are a set of extensions that enhance the guest operating system’s integration with the host system. They provide features like seamless mouse and keyboard integration, shared clipboard, and support for high-resolution displays.
- Remote Desktop Protocol (RDP):The RDP extension allows you to remotely access the virtual machine’s desktop from another computer. This is useful for managing and accessing the virtual machine from a remote location.
- USB 3.0 Support:The USB 3.0 extension enables the virtual machine to access USB 3.0 devices connected to the host system. This provides high-speed data transfer capabilities for devices like external hard drives and printers.
Security Considerations
While creating a virtual machine environment offers many benefits, it’s crucial to implement security measures to protect your data and resources. Just like any physical computer, a virtual machine can be vulnerable to attacks if not properly secured.
Managing User Accounts and Access Control
Effective user account management and access control are essential for securing your virtual machine.
- Create Strong Passwords:Encourage users to create strong passwords that are difficult to guess. This involves using a combination of uppercase and lowercase letters, numbers, and symbols.
- Implement Multi-Factor Authentication (MFA):MFA adds an extra layer of security by requiring users to provide more than just a password to log in. This could include a one-time code sent to their phone or email.
- Use Separate Accounts for Different Tasks:Assigning different user accounts for specific tasks helps limit potential damage if one account is compromised. For example, separate accounts for administration and user access.
- Regularly Review and Update User Permissions:Periodically review user permissions to ensure they are still appropriate and that no unnecessary access is granted.
Implementing Security Measures
Protecting your virtual machine requires implementing a combination of security measures.
- Enable a Firewall:A firewall acts as a barrier between your virtual machine and the outside world, blocking unauthorized access. VirtualBox includes a built-in firewall that can be configured to allow or block specific ports and services.
- Install Antivirus Software:Antivirus software is crucial for detecting and removing malware that could compromise your virtual machine. Regularly update your antivirus software to ensure it has the latest virus definitions.
- Keep the Operating System and Software Up to Date:Software updates often include security patches that fix vulnerabilities. Regularly update your virtual machine’s operating system and applications to ensure they are protected against the latest threats.
- Use Strong Encryption:Encrypting sensitive data, such as files and folders, helps protect it from unauthorized access. VirtualBox supports encryption using tools like BitLocker or VeraCrypt.
- Isolate Sensitive Data:Store sensitive data in a separate, secure location within your virtual machine to minimize the risk of it being compromised.
Troubleshooting and Support

Even with careful planning and execution, you might encounter issues during the Windows 11 deployment process on VirtualBox. This section Artikels common troubleshooting steps, resources for seeking support, and guidance for resolving specific errors.
Common Troubleshooting Steps
When facing difficulties, it’s helpful to follow a systematic approach to identify and resolve the issue. Here’s a list of common troubleshooting steps:
- Verify VirtualBox Settings:Ensure that the Virtual Machine’s configuration aligns with the minimum system requirements for Windows 11. Check the RAM allocation, processor cores, and hard drive space.
- Check Network Connectivity:Confirm that the virtual machine has access to the internet. Ensure the network settings are correctly configured within VirtualBox and that the host machine’s network is functional.
- Review Installation Logs:Examine the installation logs for any error messages or clues about the cause of the issue. These logs are usually found in the virtual machine’s hard drive.
- Restart VirtualBox and the Host Machine:A simple restart can often resolve temporary glitches or conflicts that might be causing the problem.
- Update VirtualBox:Outdated versions of VirtualBox might lack compatibility with the latest Windows 11 features. Updating VirtualBox to the latest release can often resolve compatibility issues.
- Check for Disk Space:Insufficient disk space on the virtual machine can lead to installation failures. Ensure that the virtual hard drive has enough free space for the Windows 11 installation.
Obtaining Support from the VirtualBox Community
The VirtualBox community is a valuable resource for troubleshooting and support.
- VirtualBox Forums:The official VirtualBox forums are a great place to ask questions, share experiences, and seek help from other users and developers. You can find the forums at [insert link to VirtualBox forums].
- Stack Overflow:Stack Overflow is a popular platform for technical questions and answers. Search for relevant s to find solutions or ask your own question.
- VirtualBox Documentation:The VirtualBox documentation provides comprehensive information about features, settings, and troubleshooting tips. You can access the documentation at [insert link to VirtualBox documentation].
Identifying and Resolving Specific Errors
Certain errors might require more specific troubleshooting steps. Here are some examples:
Installation Errors
- Error 0x80070002:This error indicates a problem with the installation media. Ensure that the ISO image is valid and not corrupted. Try downloading a fresh copy of the Windows 11 ISO image from a trusted source.
- Error 0x80070003:This error suggests a problem with the virtual hard drive. Verify that the virtual hard drive is properly formatted and has sufficient space. Consider creating a new virtual hard drive and reinstalling Windows 11.
- Error 0x80070057:This error might occur if the virtual machine’s BIOS settings are not configured correctly. Ensure that the virtual machine’s BIOS settings are compatible with Windows 11. You can access the BIOS settings by starting the virtual machine and pressing the appropriate key (usually F2, F10, or Del) during the boot process.
Network Connectivity Issues
- No Network Connection:If the virtual machine cannot connect to the internet, check the network settings within VirtualBox. Ensure that the network adapter is enabled and configured correctly. You might need to configure the network adapter to use a specific network interface or bridge mode.
- Slow Network Performance:If the virtual machine experiences slow network speeds, consider increasing the virtual machine’s RAM allocation or reducing the number of virtual machines running on the host machine.
Performance Issues
- Slow Boot Times:Slow boot times can be caused by insufficient RAM allocation, a fragmented virtual hard drive, or a lack of disk space. Increase the RAM allocation, defragment the virtual hard drive, or ensure enough disk space is available.
- Low Frame Rates:If the virtual machine displays slow frame rates or stuttering, try reducing the graphics settings within VirtualBox. You can also experiment with different video memory allocations.