Mastering Audio Essentials in Adobe After Effects for Professional Video Production


Adobe After Effects is universally recognized as an industry-standard application for motion graphics, visual effects, and compositing, yet it is rarely the primary tool of choice for dedicated audio mixing and mastering. While professional sound designers and video editors typically rely on specialized digital audio workstations (DAWs) such as Adobe Audition, Apple Logic Pro, or Avid Pro Tools for comprehensive acoustic engineering, motion designers frequently encounter scenarios where managing, timing, and manipulating audio clips directly inside an After Effects composition is an absolute necessity. Whether syncing a dynamic motion graphics sequence to a rhythmic music track, adding subtle sound effects (SFX) to animated user interfaces, or generating automated visual reactions based on sound frequencies, understanding how to navigate After Effects’ native audio toolset is a critical skill for any multimedia professional.
Understanding the Software Ecosystem and Workspace Configuration
To effectively work with sound in After Effects, operators must first familiarize themselves with the specialized panels and workspace configurations dedicated to audio playback and monitoring. Unlike video editors where the timeline acts as a robust multi-track mixing console, After Effects approaches audio as layered media assets that require precise management through specific interface windows.
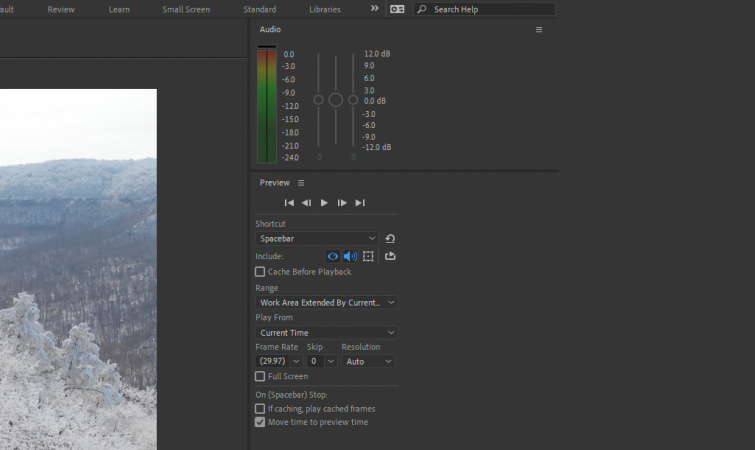
The primary control center for monitoring output volume is the Audio panel. By navigating to the top menu bar and selecting Window > Audio, users open a dedicated metering interface that displays real-time decibel levels for any audio playing within the active composition. Within this panel, editors can manually adjust the master playback level. It is vital for professionals to understand that adjustments made inside the After Effects Audio panel exclusively affect the playback preview volume and do not permanently alter the underlying gain or amplitude of the exported file unless tied to specific layer properties.

Complementing the Audio panel is the Preview panel, accessed via Window > Preview. This control window dictates how compositions render during playback testing, allowing artists to explicitly toggle audio monitoring on or off. Because complex visual compositions often require significant processing power, separating audio playback from heavy graphical rendering prevents performance bottlenecks and ensures accurate synchronization checks.
Essential Keyboard Shortcuts for Efficient Audio Workflow
Time management is a fundamental constraint in professional video production, and mastering keyboard shortcuts within After Effects significantly accelerates the workflow when dealing with sound files. Relying solely on mouse navigation to preview compositions can introduce unnecessary friction into the creative process.
The standard spacebar command initiates a basic composition preview, provided that audio monitoring is explicitly enabled within the Preview panel. However, for complex projects featuring heavy high-resolution assets and dense audio tracks, the standard spacebar preview often results in dropped frames and distorted sound playback. To circumvent this, professionals utilize the numerical keypad. Pressing the "0" key on the numeric keypad triggers a RAM Preview, which forces the system to cache both video and audio frames into the computer’s random-access memory, guaranteeing smooth, real-time playback of the integrated media.
When the objective is strictly to evaluate sound timing, pacing, or dialogue clarity without the distraction of visual rendering, editors rely on the period (".") key on the numeric keypad. This command initiates an Audio-Only preview, instantly playing back the audio track independently of graphical elements.
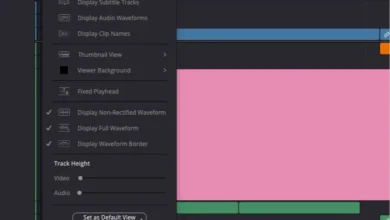
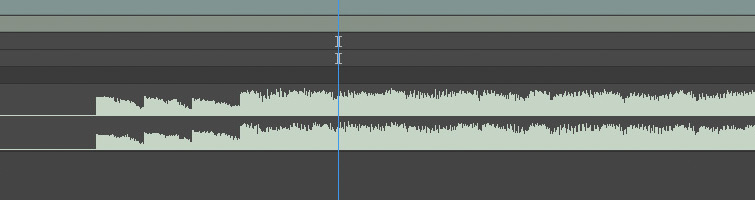
Furthermore, pinpointing exact audio cues—such as a sudden bass drop, a vocal emphasis, or a distinct sound effect impact—requires direct interaction with the audio waveform. By selecting an audio layer within the timeline and rapidly pressing the "L" key twice, After Effects instantly toggles open the audio waveform display. This visual representation of the sound file’s amplitude is indispensable for precise editing.
Composition Management and Waveform Precision
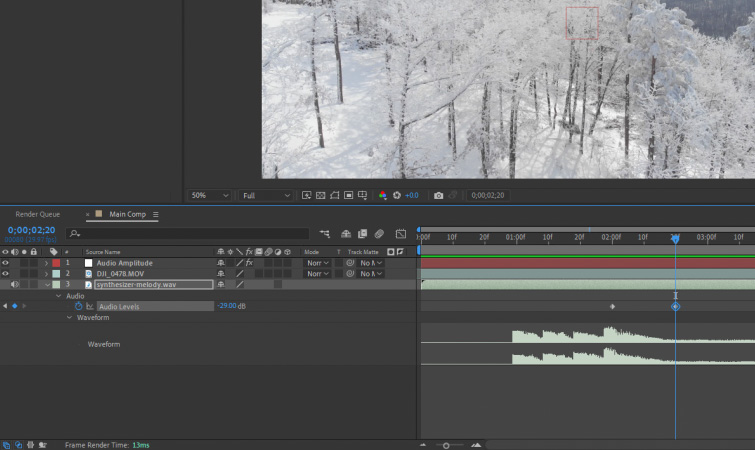
When an audio file is imported and placed into an After Effects composition, users are granted immediate control over its basic playback parameters. Each audio layer features a dedicated speaker icon situated on the far left of the timeline interface, allowing editors to instantly mute or unmute individual tracks as needed. Twirling down the layer disclosure triangle reveals comprehensive sub-properties, prominently featuring Audio Levels and the aforementioned Waveform.
Keyframing audio levels is a standard procedure for achieving smooth audio transitions, such as fading music in at the beginning of a sequence or fading it out prior to a scene transition. By activating the stopwatch icon next to the Audio Levels property, artists can plot keyframes to dynamically raise or lower the decibel output over time. As keyframes are applied, the visual waveform updates dynamically to reflect the volume adjustments.
A common pitfall for novice After Effects users is attempting to edit or sync visual cuts directly to the audio they hear during playback. Due to the way After Effects processes and caches preview audio, playback can occasionally suffer from minor latency or buffering delays. Consequently, relying on real-time listening for precise cuts often results in out-of-sync edits. Industry best practice dictates that editors should always base their cuts and visual transitions on the visual peaks of the audio waveform rather than relying entirely on real-time audio monitoring.
Native Audio Effects and Their Practical Limitations
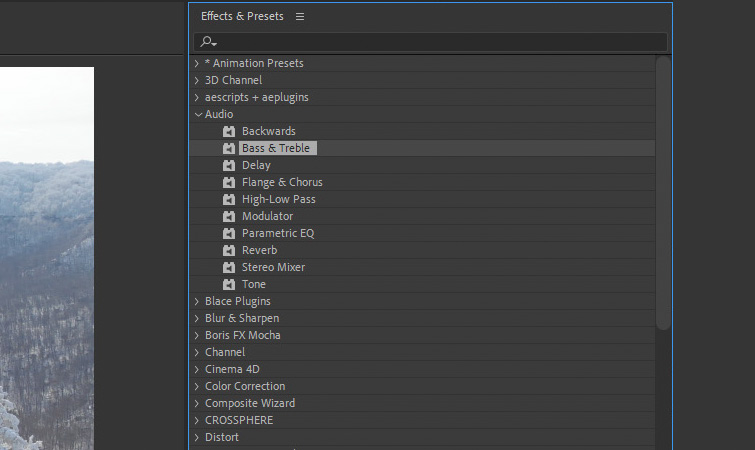
After Effects includes a modest suite of built-in audio effects, located under the Effects > Audio menu dropdown. This collection features straightforward, functional tools such as Bass & Treble, Reverb, and Stereo Mixer. While these effects provide a quick solution for basic frequency adjustments or spatial enhancement, their utility in professional broadcast or cinematic production is inherently limited.
Industry analysts and senior post-production supervisors generally advise against relying on After Effects for comprehensive sound design or audio sweetening. When intricate EQ balancing, noise reduction, compression, or multi-track mixing is required, projects should be routed to dedicated audio post-production software such as Adobe Audition or integrated directly into a non-linear editing system like Adobe Premiere Pro via Dynamic Link. Nevertheless, having immediate access to basic audio filters directly within After Effects proves exceptionally useful for quick fixes, rough drafts, or rapid prototyping when working under tight production deadlines.
Advanced Automation: Converting Audio to Keyframes
One of the most powerful and sophisticated audio-driven features within After Effects is the ability to analyze an audio file’s waveform and convert its amplitude data into animated keyframe values. This advanced capability bridges the gap between sound and motion design, enabling artists to link visual parameters—such as scale, opacity, rotation, or effect intensity—directly to the beat and energy of a soundtrack.
To execute this process, an editor right-clicks the target audio file within the active composition timeline, navigates to Keyframe Assistant, and selects Convert Audio to Keyframes. Upon execution, After Effects automatically generates a new Null Object layer titled Audio Amplitude.
When inspecting this newly created Null Object within the timeline and opening its Effects property group, users will discover three distinct slider controls: Left Channel, Right Channel, and Both Channels. These sliders continuously monitor the decibel output across the audio track and translate that data into numerical keyframes spanning the duration of the layer. By opening the Graph Editor view, artists can visually inspect these audio-driven keyframes.
Motion designers frequently utilize expression language (such as wiggle or simple parent-child linking) to connect these Audio Amplitude sliders to properties like the scale of a graphic element or the intensity of a glow effect. This technique automates audio-reactive visuals, commonly seen in music visualizations, podcast cover art animations, and high-impact motion graphics packages, saving hours of tedious manual keyframing.
Sourcing High-Quality Sound Effects for Cinematic Productions
Achieving a truly professional standard in video production requires more than polished motion graphics and clean visual effects; it demands an immersive, high-fidelity soundscape. The emotional resonance of a film trailer, commercial advertisement, or promotional video is heavily dictated by the quality of its audio design. To assist creators in elevating their projects, industry resource platforms frequently curate and distribute specialized collections of royalty-free audio assets.
Comprehensive sound libraries—such as collections dedicated to epic cinematic impacts, transitions, risers, and atmospheric drones—provide creators with the raw acoustic materials necessary to give their visual compositions maximum impact. Integrating professionally mastered sound effects alongside precise visual timing transforms a standard motion graphics project into a polished, theatrical-grade production.
Broader Industry Implications and Future Outlook of Audio-Visual Integration
The inclusion of robust audio analysis tools within a predominantly visual application like After Effects underscores a broader industry trend toward integrated, cross-disciplinary digital media workflows. As content creators face increasingly compressed production schedules and heightened consumer expectations for dynamic, highly synchronized media, the boundaries separating motion design, video editing, and audio engineering continue to blur.
Historically, post-production pipelines enforced strict linear boundaries: video was edited in one suite, graphics were generated in another, and audio was mixed exclusively in a dedicated recording studio. Today, the demand for rapid turnaround times in digital marketing, social media content creation, and broadcast design has necessitated hybrid skill sets and more versatile software environments. Features like audio-to-keyframes automation empower individual creators to produce complex, synchronized audio-visual experiences that previously required a multi-person production team.
As artificial intelligence and machine learning technologies continue to integrate into creative software suites, the future of audio-visual manipulation in applications like After Effects points toward even deeper automation. Predictive audio tagging, automated beat detection, and intelligent speech-to-animation capabilities are rapidly transitioning from experimental concepts into standard production tools. By mastering the foundational audio mechanics currently available in After Effects, digital artists build the essential technical framework required to adapt to these evolving industry standards, ensuring their work remains competitive, precise, and visually compelling in an increasingly dynamic media landscape.