Elevate Your Video Edits: Four Advanced After Effects Techniques to Transform Static Images Into Dynamic Visual Assets

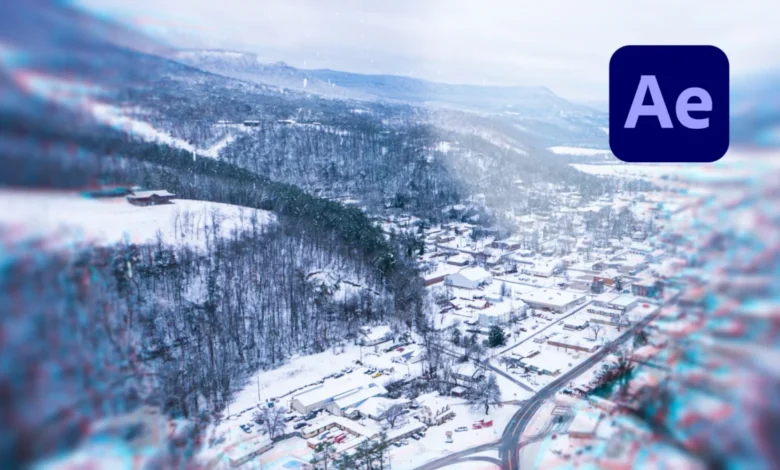
In the modern landscape of digital media and video production, creators continually search for innovative methods to maintain audience engagement. Integrating static photography and flat graphic assets into moving video compositions is a common necessity across documentaries, corporate presentations, and social media content. Historically, editors relied heavily on the traditional "Ken Burns" effect—a simple, automated slow zoom or pan across a still frame—to inject a baseline level of movement into otherwise motionless subjects. While this technique remains a staple of introductory video editing, it frequently risks appearing antiquated, low-budget, or uninspired to today’s visually sophisticated viewers. To address this creative bottleneck, industry professionals are increasingly turning to Adobe After Effects to execute more complex, multidimensional transitions. By leveraging advanced compositing tools, spatial dimensions, and custom procedural animation, editors can fundamentally alter how static elements interact within a moving scene. This comprehensive guide outlines four distinct, professional-grade methodologies to transition flat imagery into rich, dynamic visual components that captivate audiences and elevate the production value of any video project.
The Evolution of Still Imagery in Motion Design
The integration of still photography into moving image sequences dates back to the earliest days of documentary filmmaking, most notably popularized by historical documentarians who needed to bring life to archival photographs. Over the decades, digital non-linear editing systems (NLEs) democratized these capabilities, allowing hobbyists and independent creators to apply digital pans and zooms with minimal effort. However, as viewer expectations have risen alongside the proliferation of high-definition streaming platforms and cinematic-grade social media content, the limitations of flat 2D movement have become glaringly apparent.

Static images inherently lack the optical physics of real-world cinematography—specifically, parallax, volumetric depth, and atmospheric interaction. When a standard photograph is simply scaled up on a timeline, the illusion of motion quickly shatters, revealing the flat plane of the medium. To counter this, motion designers have increasingly adopted compositing software like Adobe After Effects to simulate multi-layered depth. By treating flat assets as components within a virtual three-dimensional environment, editors can replicate the complex optical characteristics of physical camera lenses, lighting environments, and spatial geometry. This shift from simple 2D scaling to sophisticated 3D spatial manipulation represents a major leap forward in modern post-production workflows, enabling solo creators to achieve results previously reserved for high-end post-production houses.
Method One: Introducing Spatial Depth with 3D Texture Layers
The first and perhaps most immersive technique for revitalizing a static image involves the introduction of animated, procedural textures operating within a three-dimensional compositing space. By separating a photograph from its immediate atmospheric environment, editors can generate a convincing sense of depth through the optical phenomenon known as parallax—the apparent displacement of an object against a background when viewed from different vantage points.
To execute this technique within After Effects, an editor begins by importing the primary photograph into the composition and designating it as a 3D Layer. Directly above this photographic asset, a secondary texture image—such as an organic glass distortion, architectural grid, or abstract light leak—is imported and similarly converted into a 3D layer. Utilizing After Effects’ virtual camera system, a new Camera is established within the composition. By navigating to the Custom Camera View, the editor can manipulate the spatial coordinates of the texture layer, physically displacing it forward along the Z-axis so that it hovers closer to the virtual camera lens than the underlying photograph.
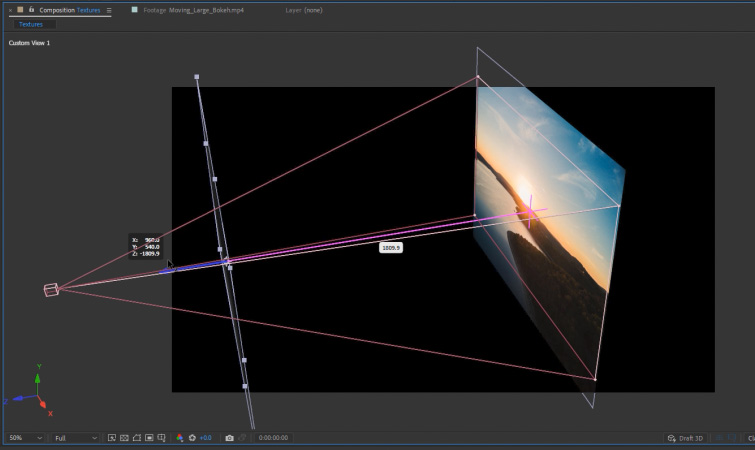
The core animation is achieved by applying precise keyframes to the Z-position property of the virtual camera, directing it to push slowly forward through the digital space. As the camera advances, the differential in distance between the foreground texture and the background photo generates a natural, organic parallax effect. This subtle interplay creates immediate visual depth, transforming a flat photograph into a layered, immersive environment. For creators seeking to expand upon this foundation, incorporating specialized asset libraries—such as curated glass or grit texture packs—provides an endless array of atmospheric variations that can be tailored to the specific tone of the video project.
Method Two: Simulating Hardware Interfaces via 3D Screen Animations
In an era dominated by digital interfaces, software demonstrations, and web-based content, editors frequently need to incorporate high-resolution screenshots, website mockups, and application dashboards into their videos. Presenting these flat screen captures front-and-center can often appear sterile and unengaging. To counteract this, motion designers employ 3D screen animation techniques to frame screenshots within a simulated physical environment, adding drama and contextual focus to otherwise dry digital assets.
The process begins by converting the target screenshot into a 3D layer and generating a two-node 3D Camera within the After Effects composition. Rather than viewing the image head-on, the camera is strategically positioned at a dynamic angle, skewed toward the specific region of the interface that warrants the viewer’s immediate attention. To maintain fluid, organic control over subsequent movements, editors introduce a Null Object, convert it to a 3D layer, and parent the 3D Camera directly to it. This Null Object functions as a centralized control hub for the camera’s spatial coordinates.
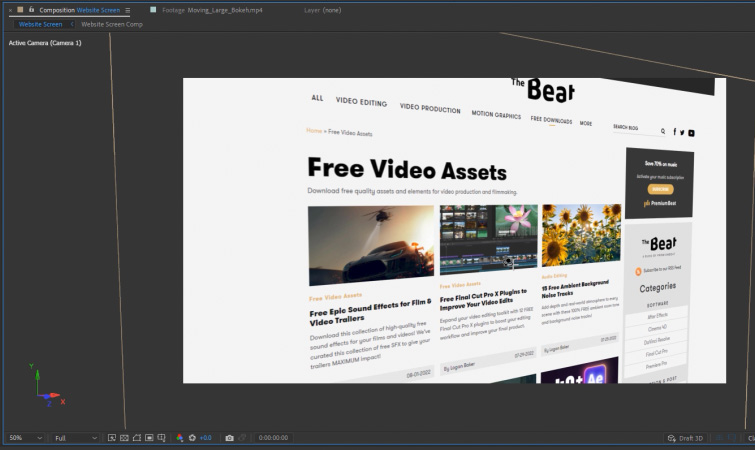
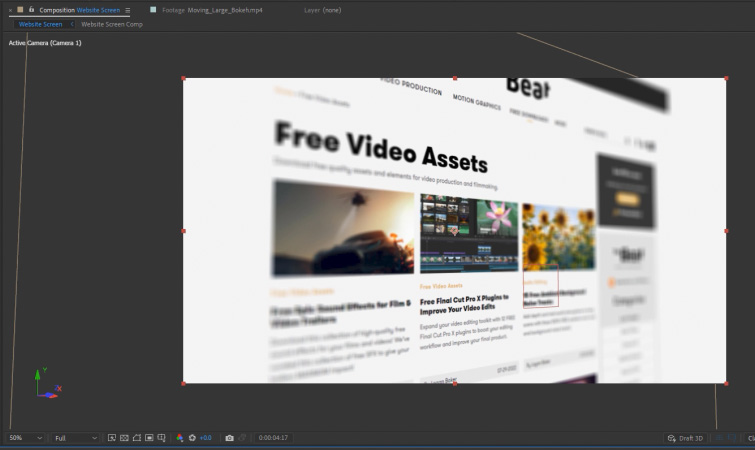
By applying keyframes exclusively to the Y-rotation property of the Null Object, the editor initiates a smooth, sweeping rotational animation across the screenshot. To refine this motion, professionals typically apply Easy-Ease keyframe interpolation and utilize the Graph Editor to fine-tune the velocity curves, ensuring the movement starts and stops with cinematic grace. As a final, polish-driven touch, enabling the Depth of Field property on the 3D Camera allows the editor to calibrate the Focus Distance. This ensures that the background or non-essential areas of the screenshot softly blur out, drawing the viewer’s eye precisely to the focal point where the animation concludes.
Method Three: Subject Isolation and Focus Manipulation Through Masking
When working with editorial photography, advertising assets, or narrative stills, drawing the viewer’s attention directly to the primary subject is paramount. While color grading and lighting adjustments play a significant role in achieving this hierarchy, advanced masking techniques in After Effects offer an additional layer of control, enabling editors to decouple a subject from its background for targeted animation.
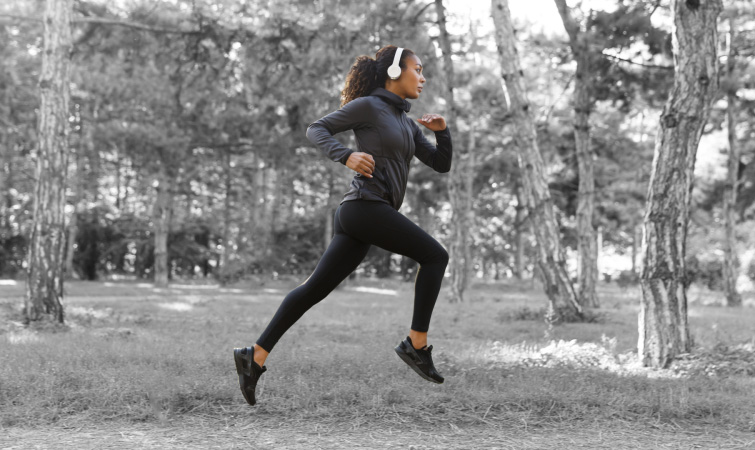
By meticulously masking out the primary subject of a photograph—whether a human athlete, a product, or an architectural landmark—the editor effectively divides the composition into two distinct visual planes: the foreground subject and the background environment. Once separated, these layers can be manipulated independently. For instance, editors can apply subtle, opposing scale and position keyframes to the foreground subject and the background, generating a micro-parallax effect that breathes life into a still frame.
Furthermore, this separation opens the door to sophisticated tonal adjustments. Creators frequently experiment by desaturating the background environment into a rich black-and-white tone while preserving the full, vibrant color spectrum of the isolated foreground subject. This stark contrast immediately commands the viewer’s attention, emphasizing the narrative importance of the subject without requiring jarring cuts or intrusive graphical callouts. When combined with gentle camera motion, masked subject isolation provides a refined, commercial-grade aesthetic suitable for high-end promotional videos and narrative openers.
Method Four: Enhancing Atmosphere with Animated Overlays
The final methodology focuses on atmospheric integration—ensuring that a static image does not simply sit on top of a video track, but rather feels as though it belongs organically within the visual ecosystem of the edit. This is achieved through the strategic deployment of animated overlays, such as bokeh light effects, falling snow, drifting dust motes, or anamorphic lens flares.
The implementation of this technique is remarkably straightforward yet yields high-impact visual results. An overlay asset is placed directly above the photograph within the After Effects timeline. By adjusting the layer’s blending mode—typically selecting Screen, Add, or Multiply depending on the luminance and color profile of the overlay—the background of the overlay disappears, leaving only the animated light phenomena, particles, or textures interacting with the underlying image.
The continuous, organic motion of the overlay introduces a subconscious layer of realism to the still photograph. Dust particles catching imaginary light, or subtle bokeh shifts dancing across the frame, trick the human eye into perceiving depth and environmental presence where none previously existed. Content creators frequently leverage comprehensive libraries of free or commercial overlays—ranging from atmospheric weather effects to volumetric god rays—to rapidly tailor the mood of a scene. By marrying these animated elements with the foundational photo adjustments, editors can seamlessly bridge the gap between static photography and moving video, ensuring a cohesive and professional final cut.
Broader Implications and Industry Impact in Modern Post-Production
The continuous advancement of digital compositing tools like Adobe After Effects reflects a broader evolution within the media production industry. As the barrier to entry for video editing lowers through software accessibility, the distinguishing factor between amateur content and professional production increasingly lies in the nuance of motion design and visual depth. Techniques that once required dedicated visual effects studios and expensive proprietary software are now routinely executed by independent creators working from home editing suites.
The economic and creative implications of this accessibility are profound. Brands, independent filmmakers, and digital creators are now expected to maintain high visual standards across all forms of media, including archival inserts, promotional graphics, and social media deliverables. By mastering multi-layered 3D space, spatial camera controls, subject masking, and atmospheric overlays, editors can maximize the utility of existing photographic assets, reducing the need for costly reshoots while significantly enhancing viewer retention. As software developers continue to integrate artificial intelligence and machine learning into compositing tools—such as automated rotoscoping and instantaneous depth estimation—the future of static image animation promises to become even more streamlined, empowering creators to push the boundaries of visual storytelling even further.