Mastering Atmospheric 3D Environments: A Comprehensive Workflow Breakdown by Digital Artist Calder Moore

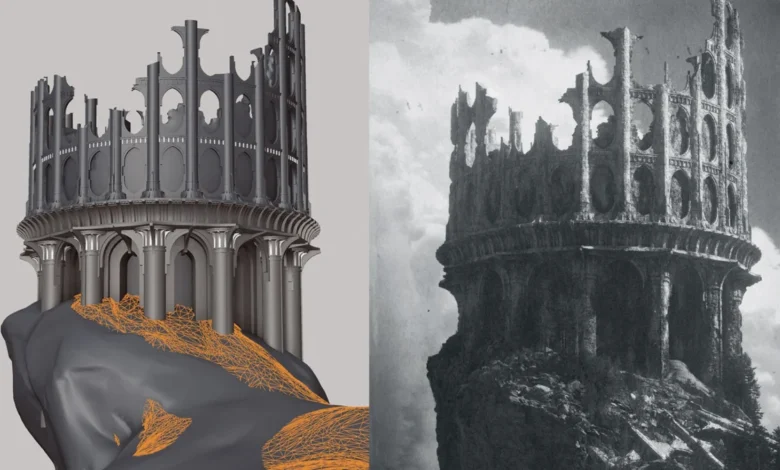
The digital art landscape continues to evolve at a breathtaking pace, driven by advances in procedural generation, real-time rendering engines, and sophisticated displacement mapping techniques. For aspiring and professional 3D generalists alike, crafting a hyper-detailed, emotionally resonant environment often presents a formidable hurdle. To demystify this intricate process, renowned freelance sci-fi and fantasy environment artist Calder Moore has released a comprehensive masterclass detailing his end-to-end pipeline for creating moody, story-driven landscapes using Cinema 4D, ZBrush, Octane Render, and Adobe Photoshop.
Industry Context and the Evolution of 3D World-Building
In the modern digital entertainment industry—spanning video game development, feature film visual effects, and high-end advertising—the demand for rapid prototyping and photorealistic environment design has never been higher. Historically, artists spent weeks manually modeling individual foliage assets, intricate architectural stonework, and sprawling geological formations. However, modern workflows heavily leverage asset libraries, procedural scatter systems, and displacement-driven geometry to achieve unprecedented levels of geometric and textual complexity without sacrificing render times or hardware stability.
Moore’s approach exemplifies this contemporary philosophy. By combining the procedural strengths of Cinema 4D with the organic sculpting power of ZBrush and the unbiased GPU rendering capabilities of Octane Render, artists can drastically compress their production schedules. This efficiency allows creators to redirect their focus away from technical bottlenecks and toward the core artistic pillars of a project: composition, lighting, narrative depth, and emotional resonance.
Pre-Production and Strategic Workflow Management
Before opening any 3D software suite, Moore stresses the importance of meticulous pre-production planning. The initial phase begins with visual research and mood-boarding. Gathering inspirational reference imagery concerning architecture, atmospheric lighting, and color palettes establishes a cohesive artistic vision. Furthermore, Moore advocates for the pre-preparation of digital assets. Maintaining a personal library of reusable foliage scatter systems, procedural shaders, and modular structural elements prevents repetitive tasks in future projects.
To combat the psychological barrier of facing a blank canvas—a phenomenon common among digital creators—Moore recommends a methodical task-decomposition strategy. By breaking down a monumental project into twenty micro-tasks (such as modeling structural pillars, fracturing masonry, sculpting terrain, and painting vertex maps), the creative process becomes structured and entirely manageable.
Phase One: Ideation, Thumbnails, and Blocking
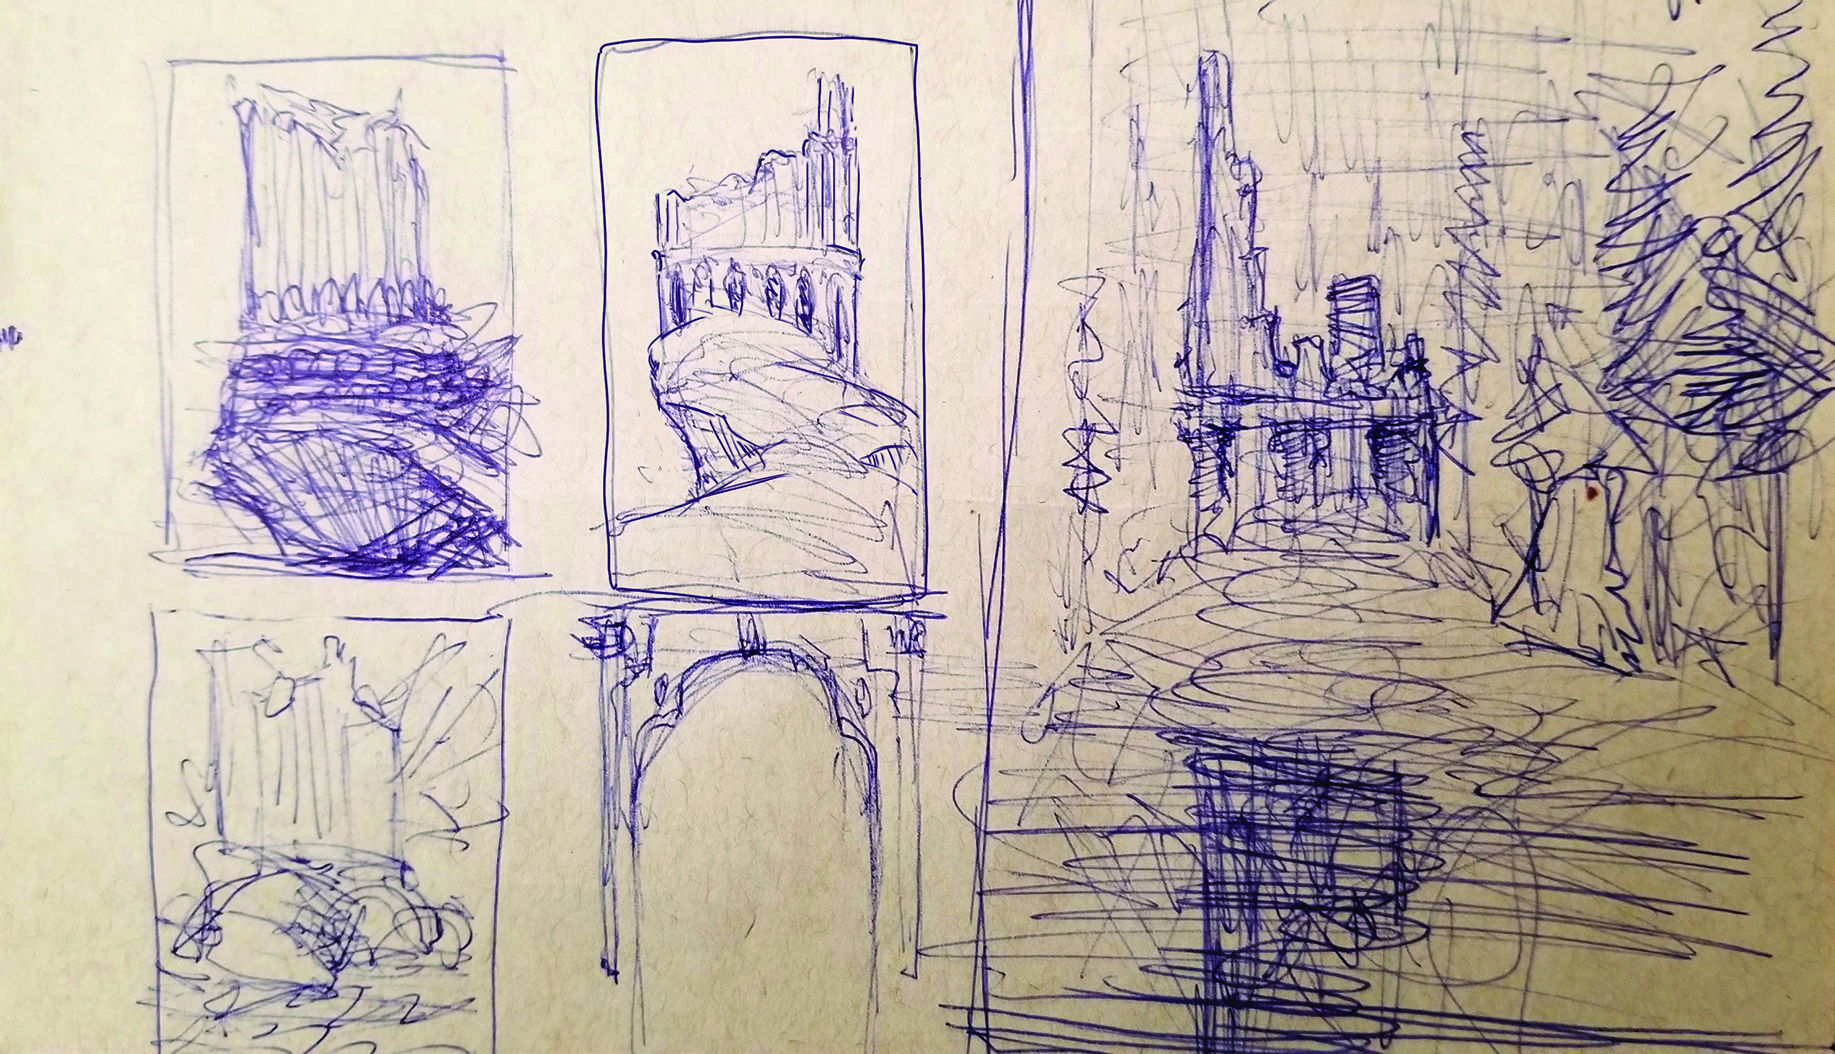
The production officially commences with rapid thumbnail sketching. This initial step enables artists to experiment with multiple compositional layouts in a matter of minutes, determining how the viewer’s eye will traverse the frame. For his featured ruin scene, Moore sought to evoke a specific narrative archetype: an ancient, forgotten tower radiating a lonely, dormant power.
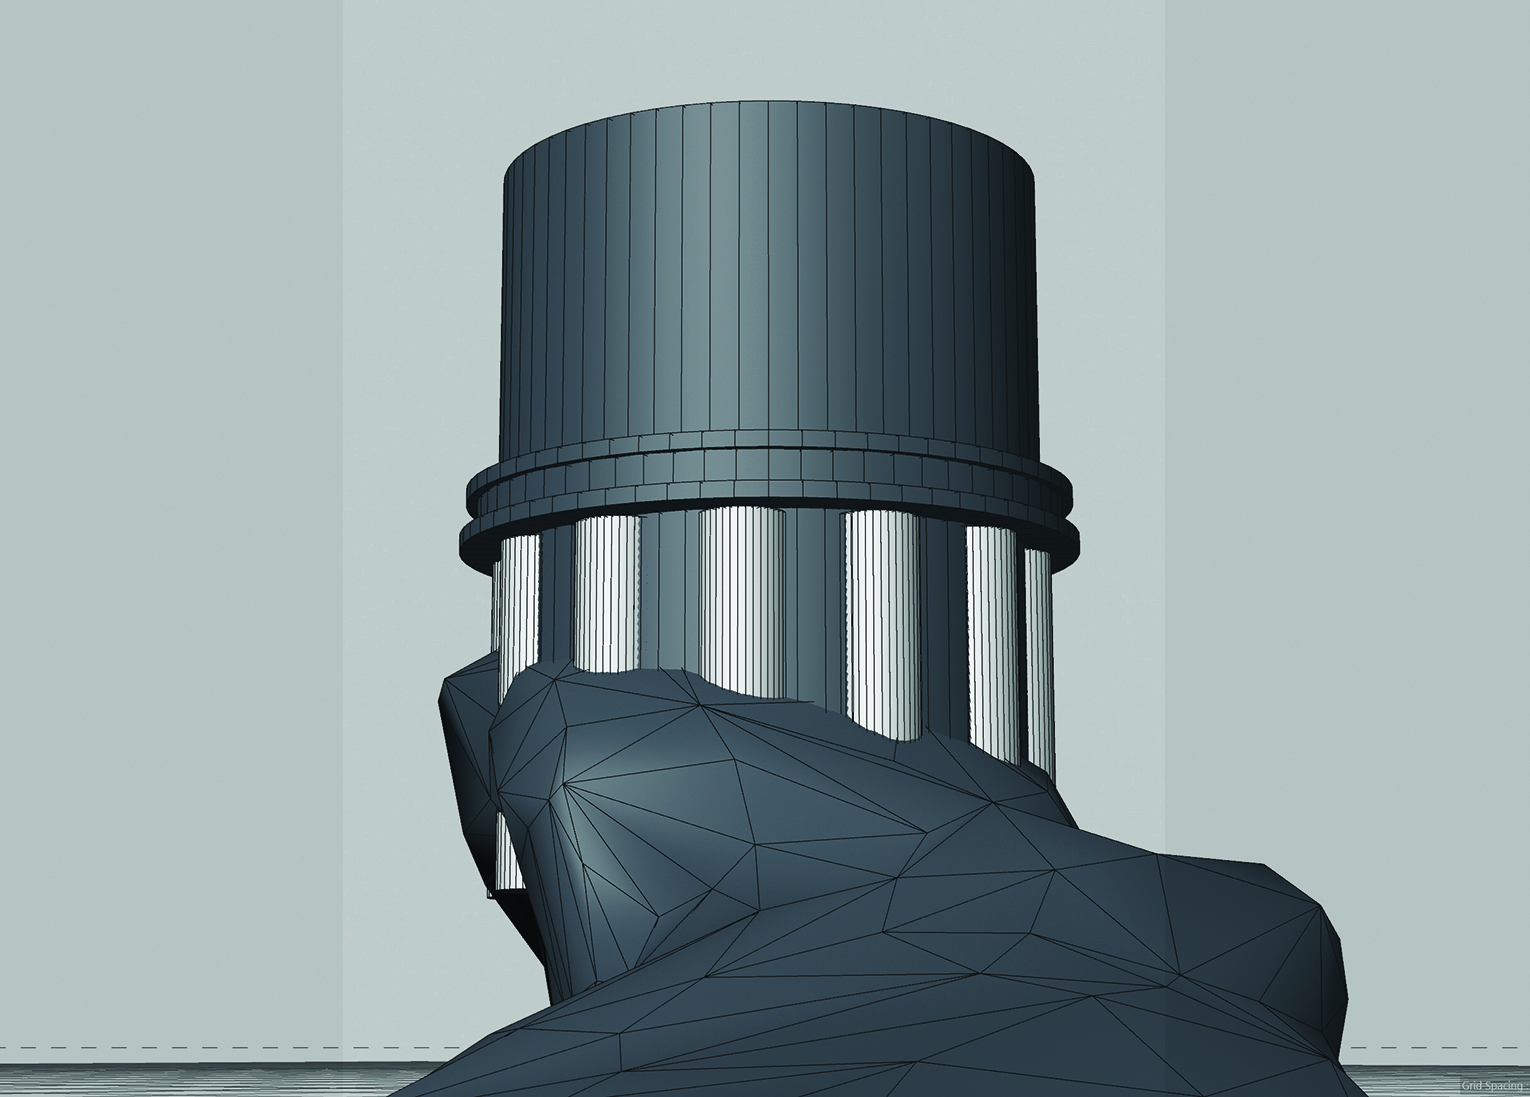
Once a definitive sketch is selected, the workflow transitions into Cinema 4D for the blocking stage. Using primitive geometry and basic sculpting brushes, the artist establishes the macro-forms of the landscape and the primary silhouette of the central tower. Crucially, the virtual camera position is locked down early in this phase. Securing the camera framing early prevents wasted effort on unseen geometry and ensures that all subsequent detailing directly serves the final rendered perspective.
Phase Two: Modular Construction and Procedural Destruction
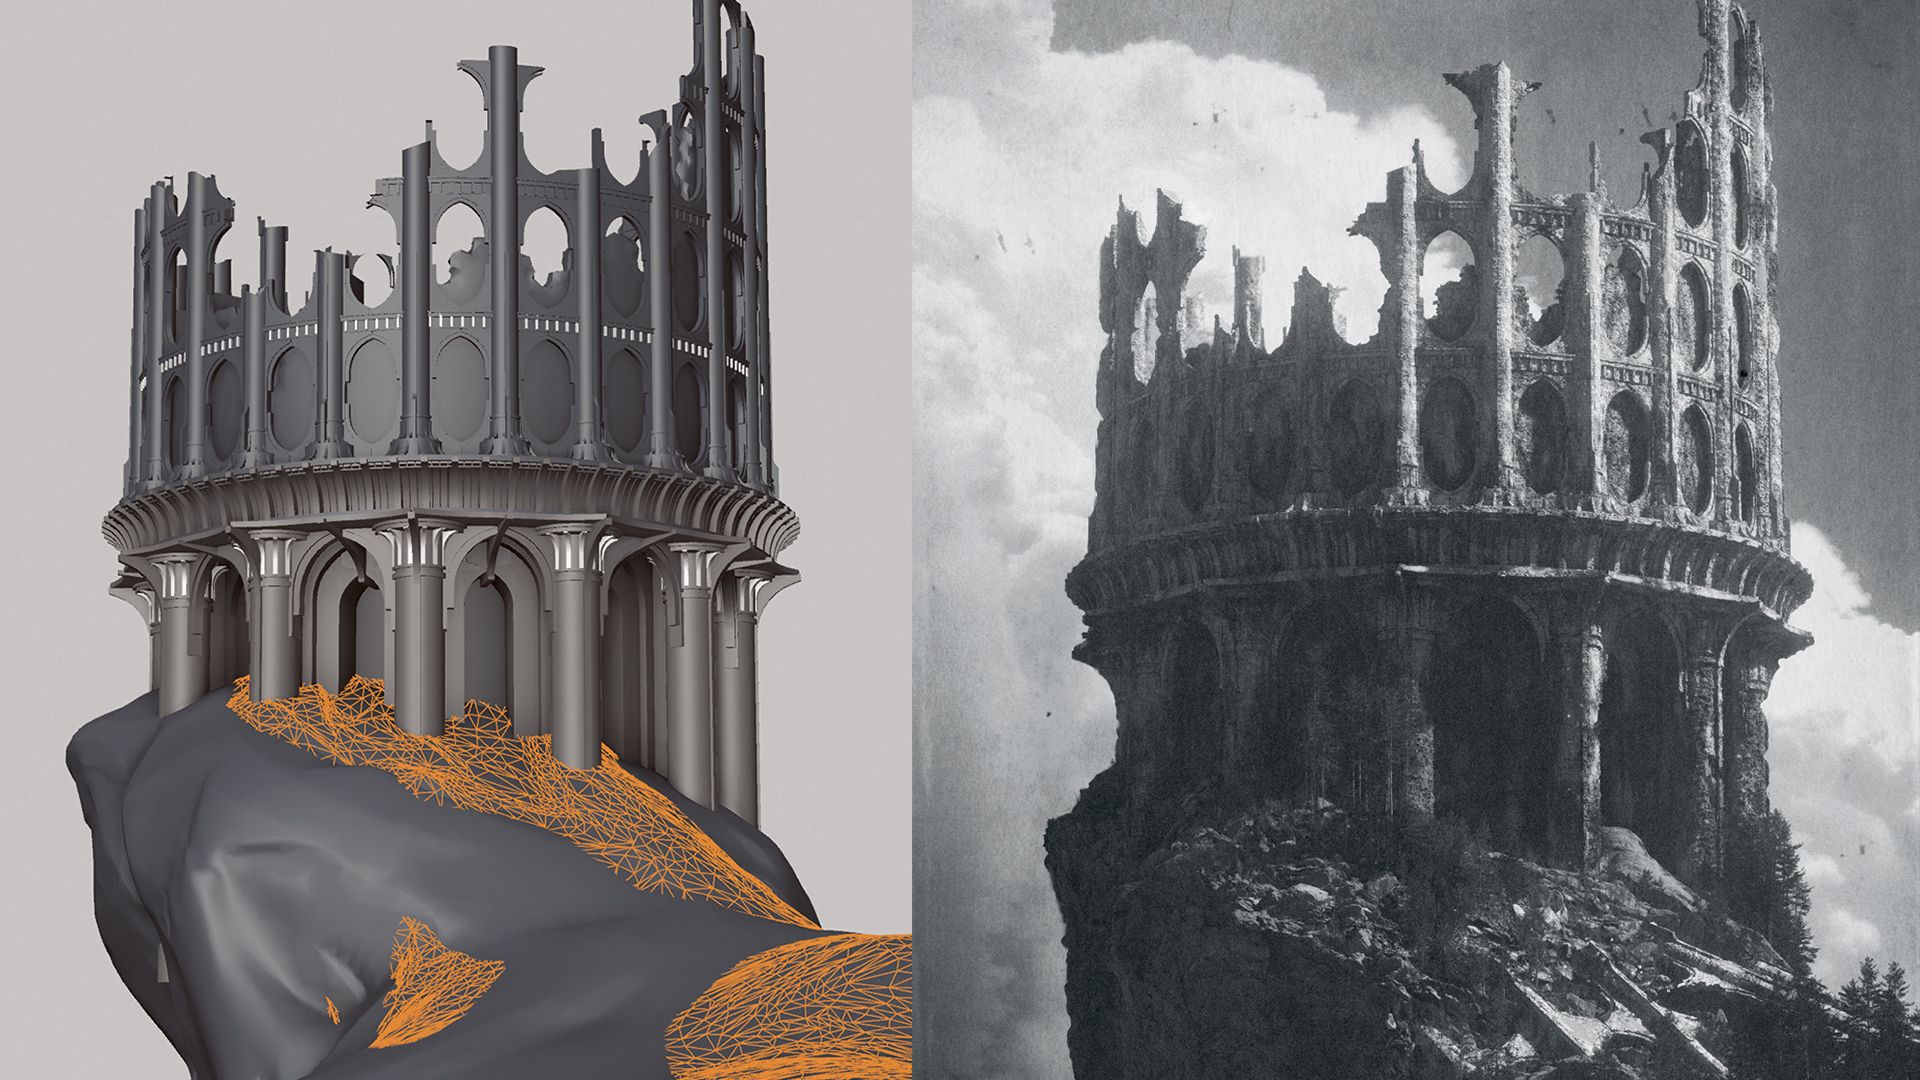
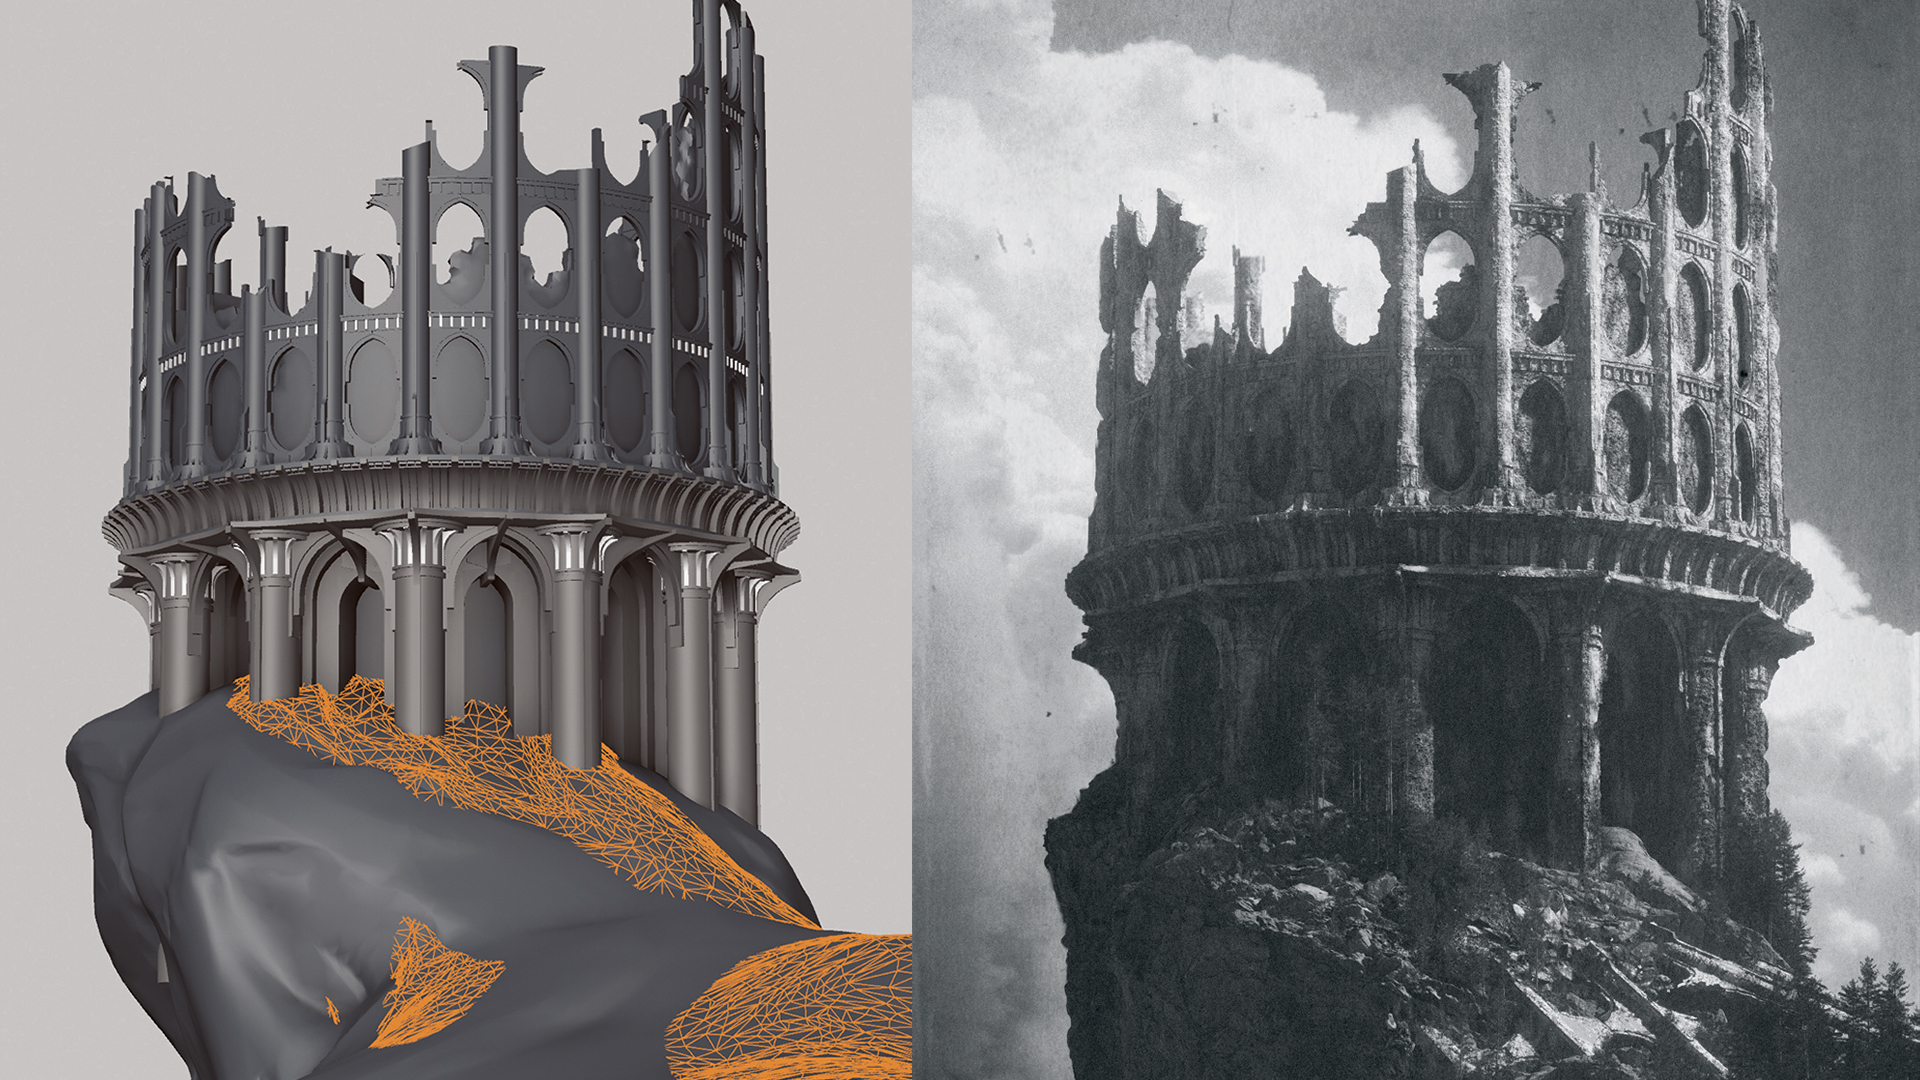
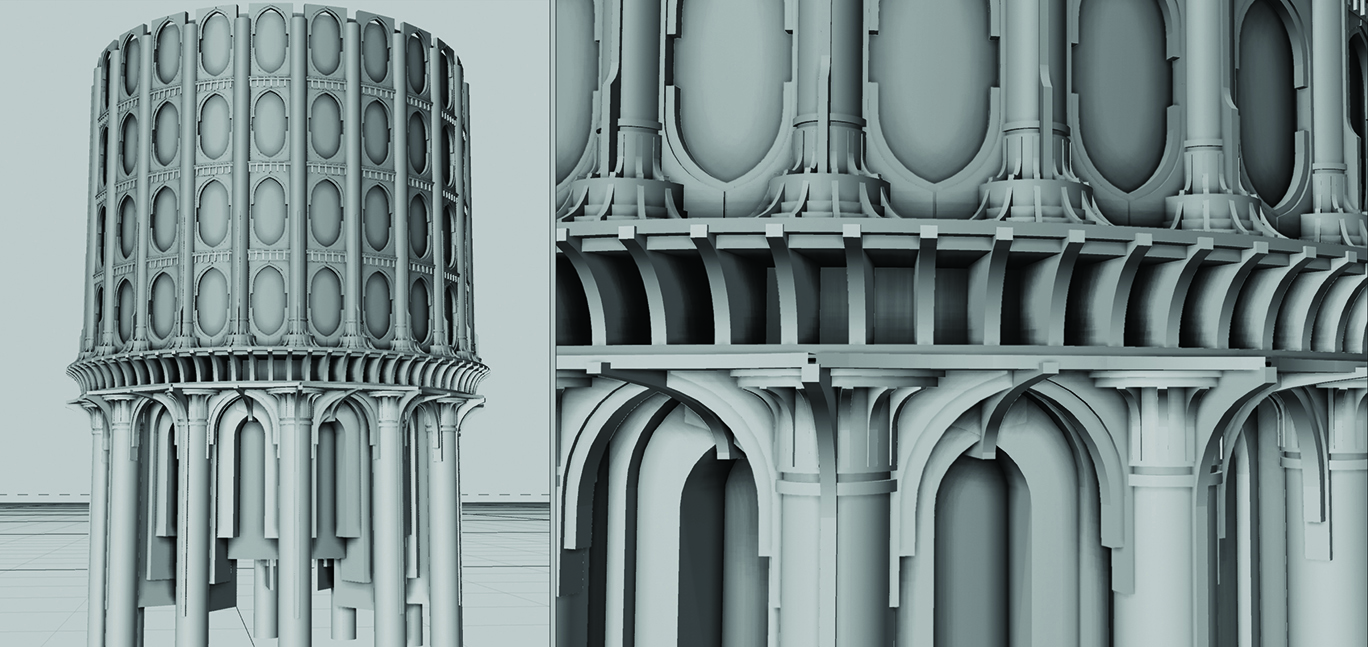
With the composition anchored, the architectural focus shifts to the tower itself. Rather than modeling every brick and archway by hand, Moore employs displacement textures mapped onto basic geometric meshes. Symmetry tools govern the construction of complex archways, while radial cloners duplicate architectural pillars to form the primary structure efficiently.
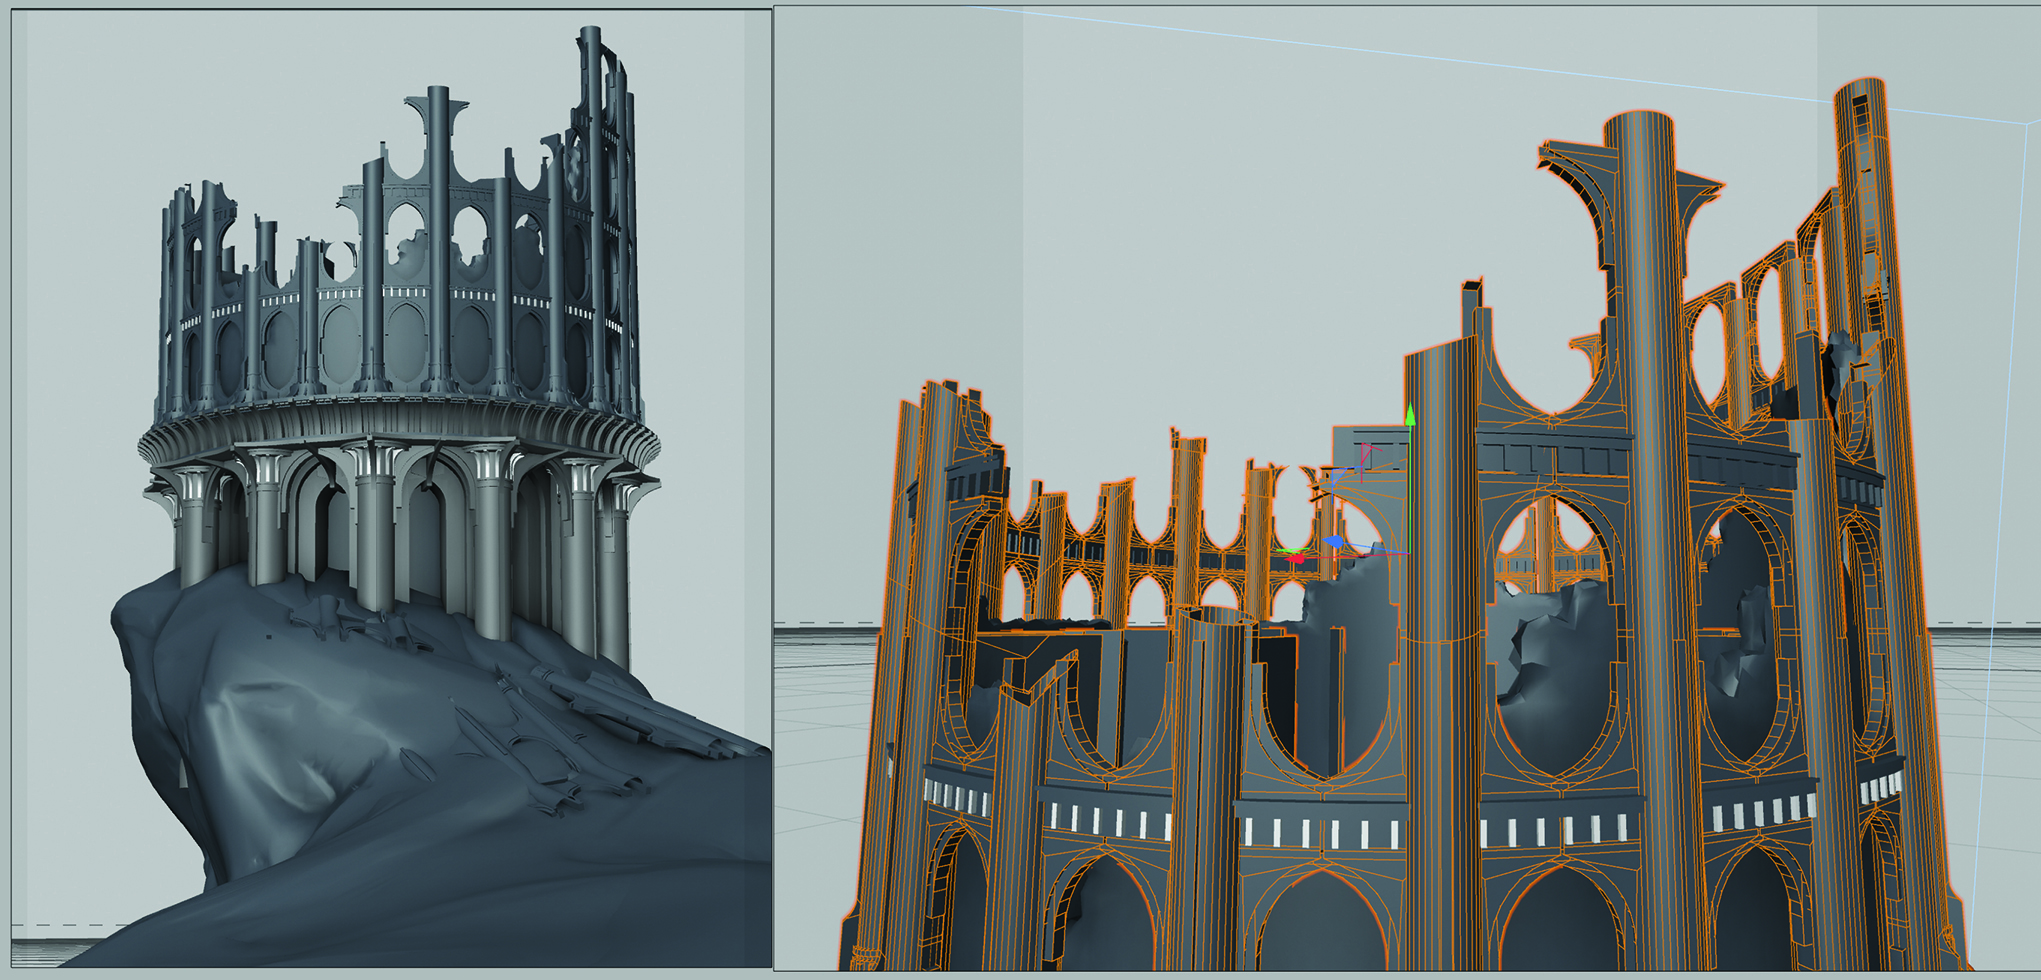
The narrative tension of the scene relies heavily on environmental storytelling, specifically the decay of civilization. To achieve a realistic collapse, Moore utilizes advanced geometry tools, including the knife tool and Voronoi fracture systems. By making deliberate cuts through the masonry and selectively deleting fragmented sections via lasso selection, the structure assumes a natural, weathered ruin aesthetic.
Phase Three: Terrain Sculpting, Displacement, and Layering
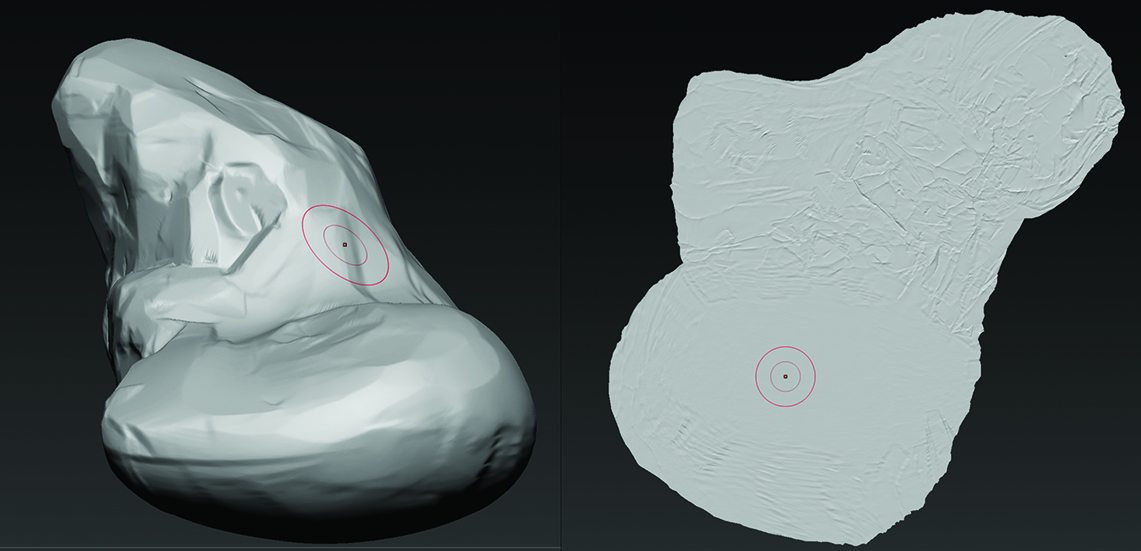
Ground realism is often the dividing line amateur and professional 3D environments. Moore exports the basic terrain geometry from Cinema 4D into ZBrush to refine major geological shapes through digital sculpting. To maximize efficiency, fine surface details are deferred to the texturing stage via displacement mapping. Prior to returning the asset to Cinema 4D, clean UV maps are generated to prevent severe visual artifacting during displacement calculations.
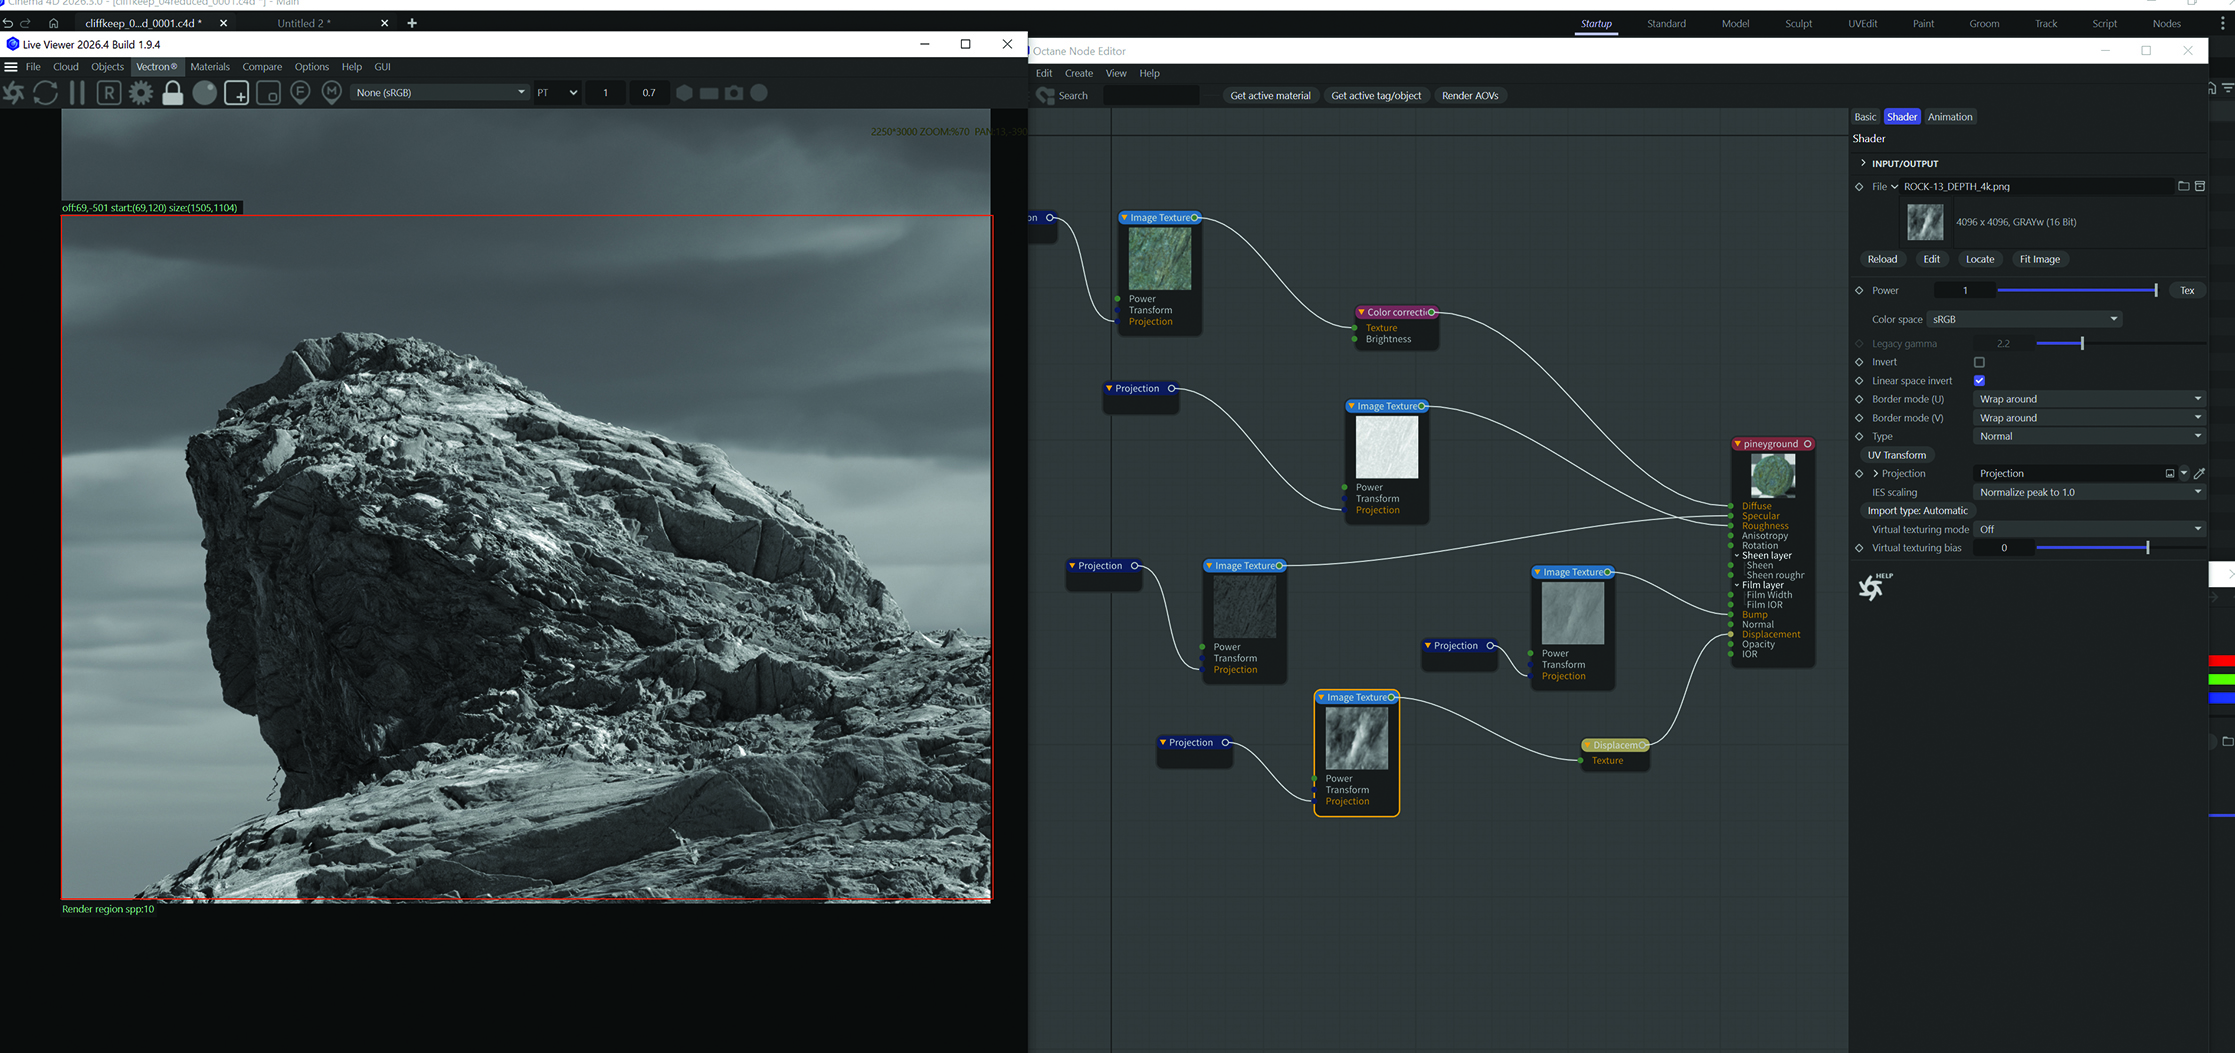
Back in Cinema 4D, the terrain shader is constructed using high-resolution, photoscanned rock materials sourced from industry-standard libraries such as Megascans. Cranking up the displacement scale introduces staggering depth and complexity to an otherwise simple mesh.
Recognizing that a uniform cliff texture fails to represent natural geological variation, Moore employs a sophisticated layering technique. He duplicates the terrain geometry, elevates it slightly along the Y-axis, selectively sculpts depressions, and applies a distinct, weathered ground material. The resulting interplay between cliff faces and loose earth creates a seamless, naturalistic blend. A similar texturing methodology is applied to the tower, where tileable stone shaders are enhanced with procedural noise maps and gradient shaders to simulate realistic grime accumulation at the base of the structure.
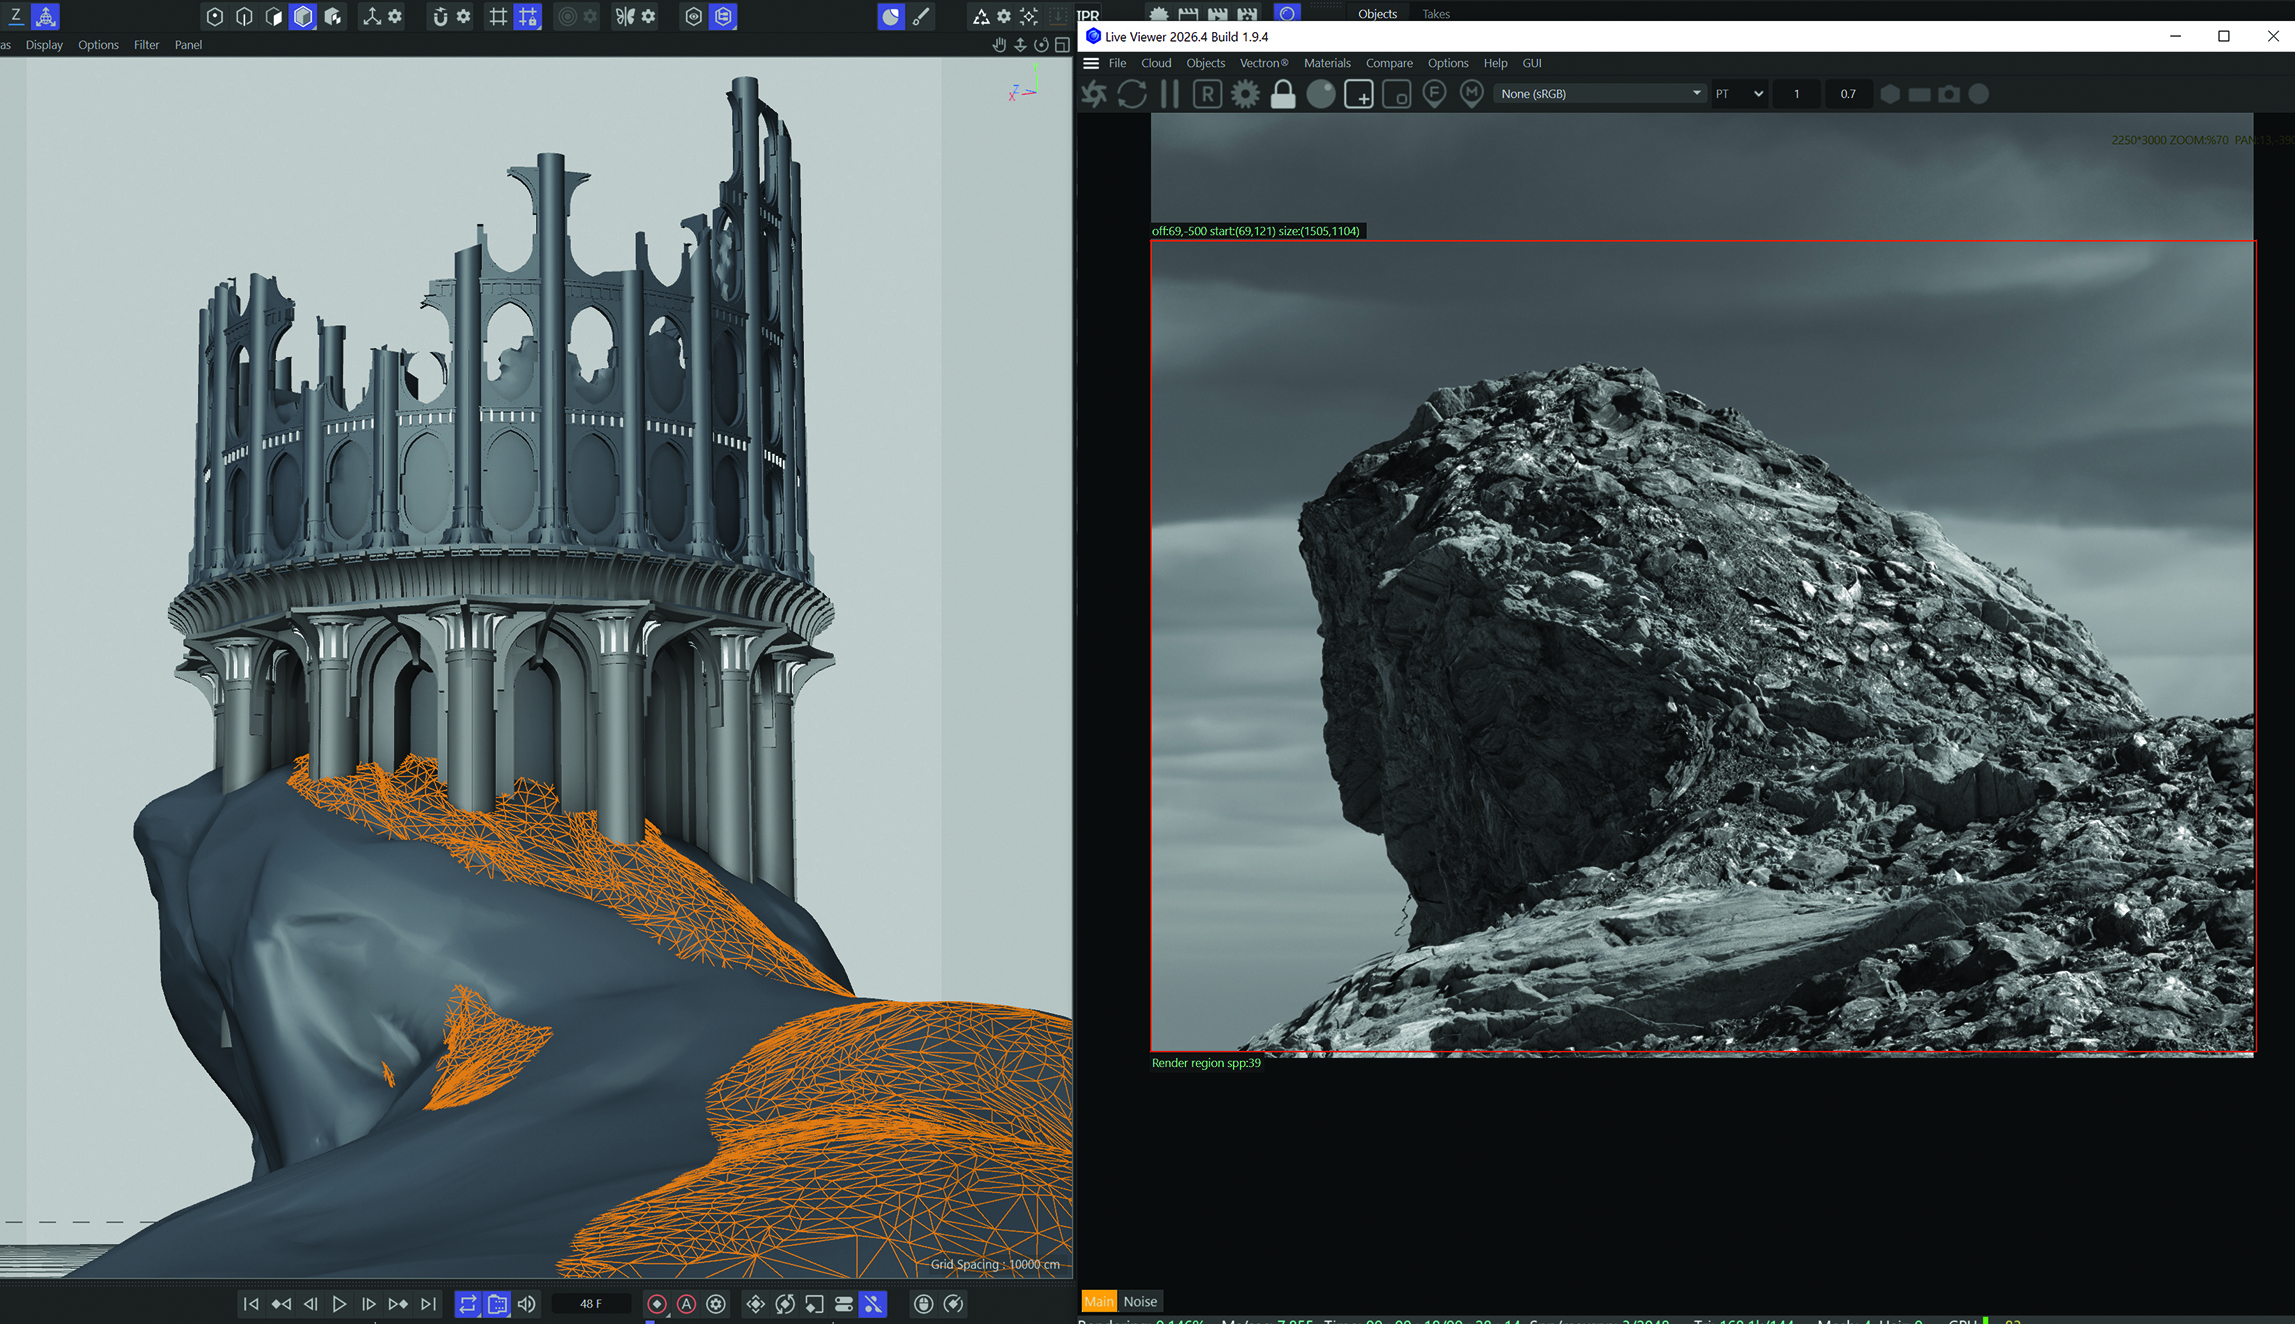
Phase Four: Lighting, Atmospheric Integration, and Scattering
Lighting serves as the emotional anchor of the piece. Operating in tandem with the texturing phase, Moore experiments with multiple High Dynamic Range Images (HDRIs) to identify a lighting scheme that maximizes contrast, readability, and dramatic tension. A strategically placed cloud plane is introduced to guide compositional flow across the frame.
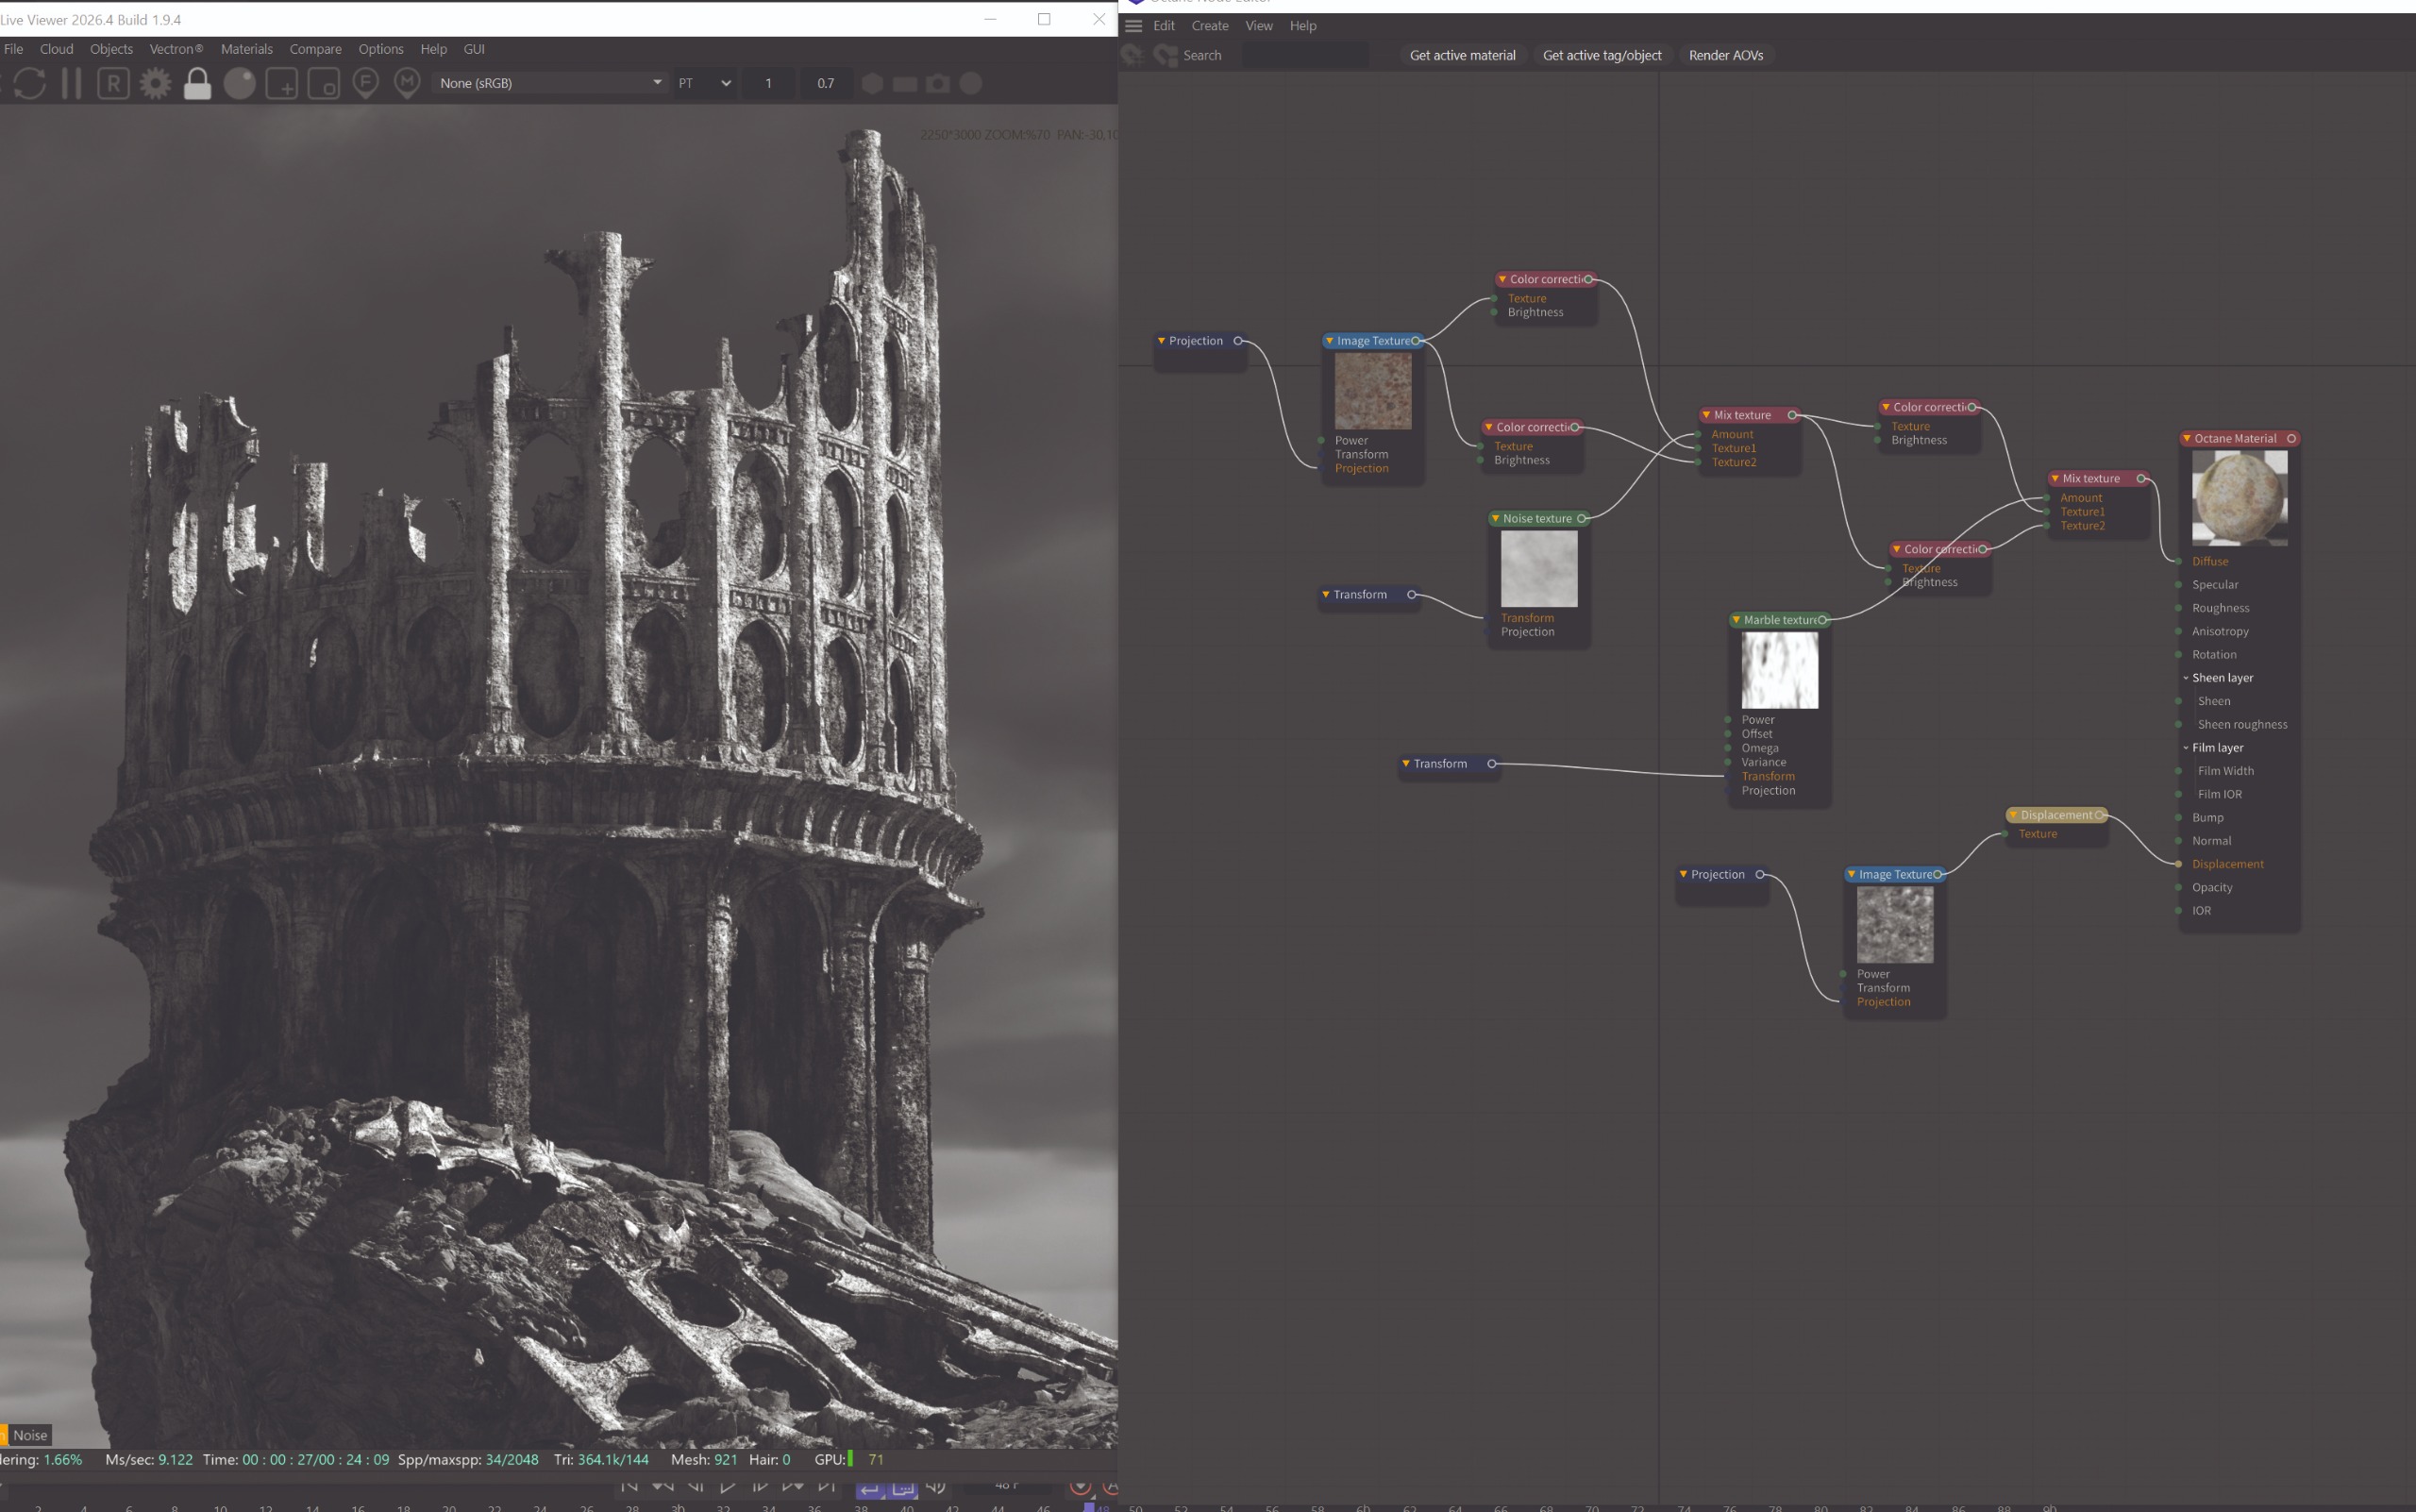
The environment’s organic density is achieved through procedural scattering systems. Utilizing vertex maps painted directly onto the terrain mesh, Moore directs Octane Scatter to populate the landscape with carefully curated foliage assets, including pine trees, low-lying shrubs, and dense patches of grass. Working in localized sections ensures that hardware resources remain optimized throughout the process.
Phase Five: Rendering Optimization and Post-Production
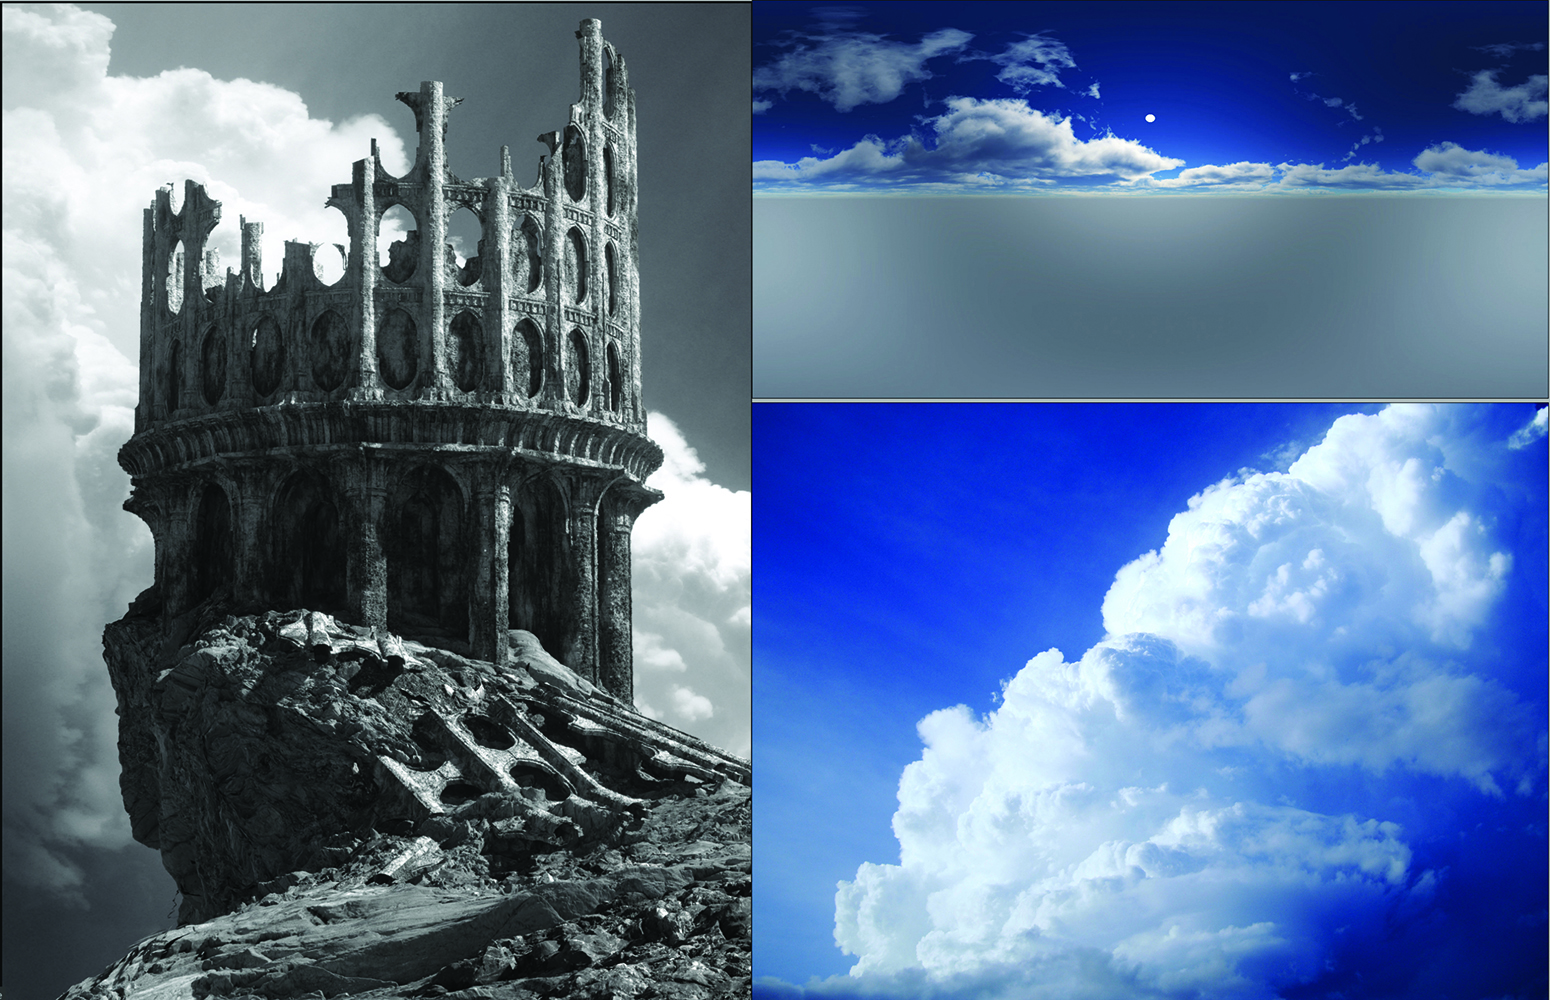
The final 3D production phase involves rendering optimization. Because dense nature scenes place heavy demands on GPU memory, Moore renders passes incrementally. Alongside the beauty pass, essential utility passes—including Z-Depth, Bloom, and Object ID—are exported for downstream compositing.
The workflow then moves to Adobe Photoshop for final polish and grading. Initial steps involve manual brush touch-ups to eliminate any residual displacement artifacts or awkward geometric transitions. To achieve a vintage photographic aesthetic, Moore manipulates exposure levels, deepens the black points, and integrates the pre-rendered bloom and atmospheric depth passes.
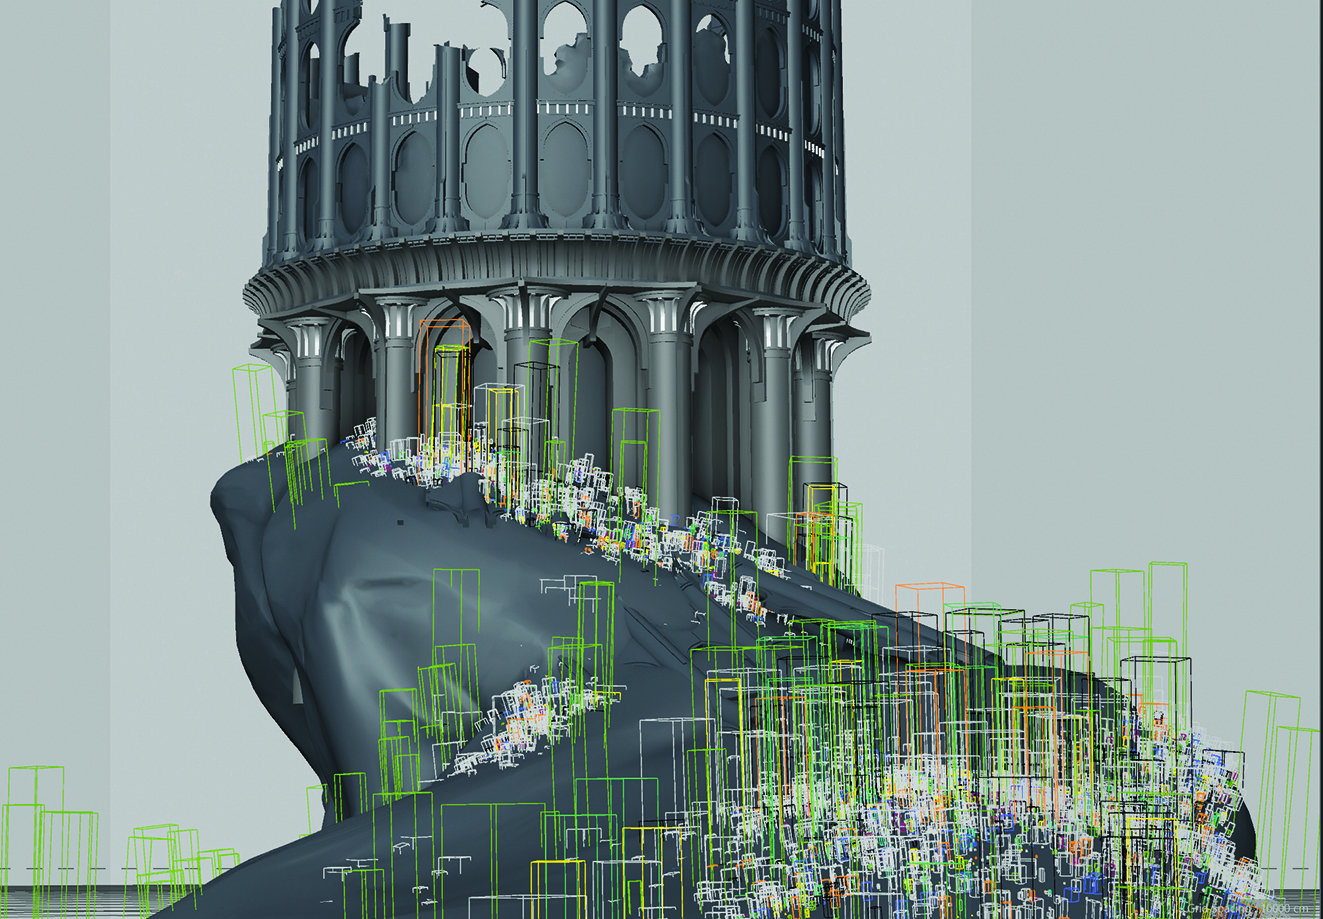
Subtle blur is applied to distant architectural elements to enhance spatial separation between the foreground and background. Finally, vintage paper overlays and subtle film grain are blended into the composition using specialized layer styles. This deliberate texturing step unifies the digital elements, effectively masking the pristine "3D look" and resulting in a cinematic, narrative-driven masterpiece that bridges the gap between digital rendering and traditional fine art.