Mastering Color Correction: How to Eliminate Unwanted Yellow Tints and Achieve Pristine Whites in Post-Production


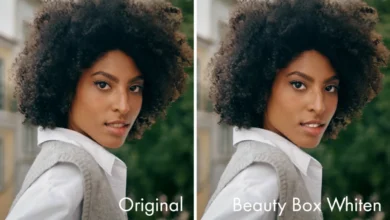
Video editors and post-production professionals frequently encounter a frustrating optical anomaly during the color-grading phase: footage where neutral whites are corrupted by an unintended yellow, amber, or orange color cast. Often stemming from slight inaccuracies in white balance during principal photography, environmental lighting contamination, or limitations in sensor technology under mixed-lighting conditions, these color imbalances can severely degrade the visual fidelity of a project. While standard white balance adjustments in editing suites like Adobe Premiere Pro offer a foundational fix, they frequently fail to resolve localized color discrepancies without negatively shifting skin tones or altering the surrounding color palette.
To address this persistent challenge, post-production workflows have increasingly relied on advanced secondary color correction techniques. By utilizing specific curve-based adjustments within native color-grading tools, editors can surgically isolate and neutralize unwanted chromatic aberrations while preserving the natural saturation of the rest of the frame. This technical guide examines the underlying causes of color casts, outlines a precise step-by-step methodology using Adobe Premiere Pro’s Lumetri Color panel, provides context on the evolution of digital color workflows, and analyzes the broader implications of advanced grading techniques for modern content creators.

The Technical Origins of Color Casts in Digital Cinematography
To understand why unwanted yellow and orange hues appear in post-production, one must examine the mechanics of digital image capture. Modern digital cinema and mirrorless cameras rely on complementary metal-oxide-semiconductor (CMOS) sensors covered with a Color Filter Array (CFA), most commonly the Bayer filter pattern. This grid alternates red, green, and blue pixels to capture full-color images. When a camera’s white balance is set incorrectly—such as shooting under tungsten indoor lighting with a daylight white balance preset—the sensor over-registers long-wavelength light (reds and yellows) relative to short-wavelength light (blues).
Even when automated white balance (AWB) systems are employed, complex lighting environments involving mixed color temperatures frequently confuse camera algorithms. For instance, a subject standing near a window receiving cool daylight while indoor ambient lighting stems from warm incandescent bulbs creates a dual-lighting scenario. In such cases, the camera cannot accurately neutralize both light sources simultaneously. Consequently, shadow areas and specular highlights often retain an undesirable amber or greenish-yellow tint.
Historically, correcting these anomalies required destructive global adjustments that would inadvertently shift the hue of skin tones, skies, and corporate brand colors. In the era of broadcast television and analog tape, color timing was severely limited by hardware constraints. Modern digital non-linear editing systems (NLEs), however, provide non-destructive, node-based and curve-based environments that allow colorists to target microscopic slices of the color spectrum without altering adjacent tones.

Step-by-Step Methodology: Neutralizing Yellow Casts via Lumetri Color
For editors working within Adobe Premiere Pro, the Lumetri Color effect serves as the primary hub for both primary and secondary color correction. When standard temperature and tint sliders prove insufficient for cleaning up contaminated whites, the Hue vs Saturation curve offers a precise alternative.
The step-by-step procedure to isolate and suppress unwanted yellow and orange hues involves a methodical sequence within the Lumetri panel:
- Application of the Color Effect: Navigate to the Effects panel, locate Lumetri Color, and apply it to the target video clip on the timeline.
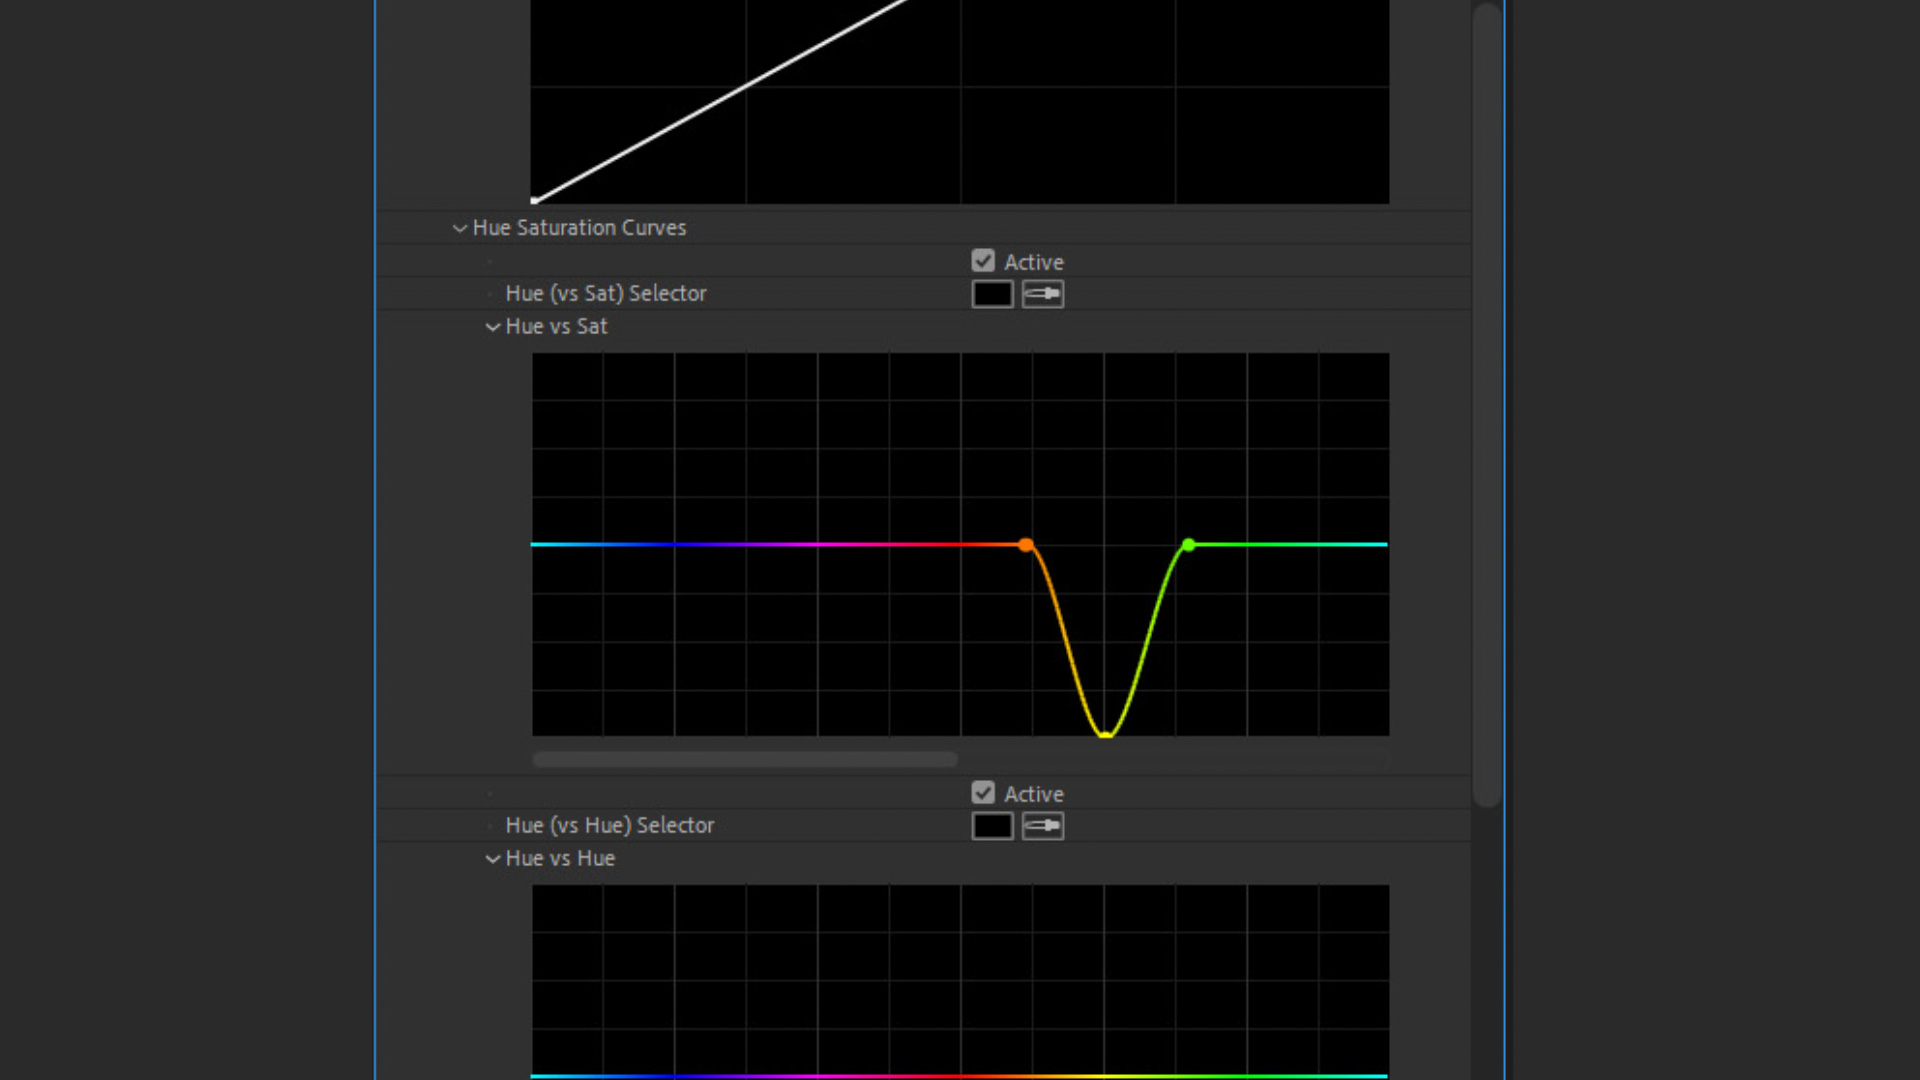
- Navigating the Curves Tab: Within the Lumetri Color interface, expand the Curves section and locate the Hue vs Sat (Hue versus Saturation) curve. This interface visualizes the entire 360-degree color wheel as a horizontal, rainbow-colored linear graph, where the vertical axis represents saturation levels.
- Establishing Control Points: To surgically target only the problematic yellow and orange tones without affecting reds, blues, or magentas, the user must anchor the surrounding color space. Click to establish three distinct control points on the linear graph corresponding to the Orange, Yellow, and Green spectral regions. These anchor points act as boundaries, ensuring that color adjustments do not bleed into adjacent hues, such as human skin tones (which often reside in the orange-red spectrum).
- Adjusting Saturation: Select the central control point corresponding to the yellow spectrum and drag it downward along the vertical axis. This action selectively reduces the saturation of yellow hues within the frame. Depending on the severity of the original color cast, the point can be dropped halfway or entirely to the baseline.
- Fine-Tuning for White Balance Anomalies: For footage exhibiting a severe overall warm bias—such as exterior daylight scenes captured at sunrise or sunset where highlights appear excessively orange—the primary yellow control point may be shifted slightly toward the orange spectrum before being pulled downward. This suppresses the overarching warm tint while maintaining the desired atmospheric mood of the scene.
Through this workflow, editors bypass the limitations of global white balance sliders, achieving pristine, neutral whites while preserving the integrity of the broader color palette.
Industry Evolution and the Shift Toward Non-Destructive Secondary Grading
The development of advanced curve tools represents a significant milestone in the democratization of high-end color grading. Two decades ago, professional color grading was restricted to dedicated hardware suites—such as DaVinci systems—costing hundreds of thousands of dollars and operated exclusively by specialized colorists. Basic consumer and semi-professional editing software offered rudimentary contrast and brightness controls, leaving editors with few options for salvaging poorly balanced footage.
As digital sensors proliferated and video compression codecs evolved to capture wider dynamic ranges and wider color gamuts (such as Log profiles and RAW formats), the demand for sophisticated in-software grading tools surged. Adobe introduced the Lumetri Color panel in 2015, integrating robust color-correction toolsets directly into Premiere Pro. This integration bridged the gap between basic editing and professional finishing, enabling independent filmmakers, corporate videographers, and digital content creators to execute complex secondary color corrections natively.
Industry analysts note that the democratization of these tools has fundamentally altered production pipelines. While high-end feature films still rely on dedicated color-grading suites like DaVinci Resolve, rapid-turnaround commercial projects, documentaries, and social media content are increasingly finished entirely within NLE environments. Techniques like the Hue vs Sat curve adjustment for whites have thus become standard operational knowledge for modern video professionals.

Broader Implications for Content Quality and Efficiency
The ability to quickly resolve white balance errors in post-production carries significant economic and operational implications for video production teams. Time spent on set troubleshooting lighting ratios or executing multiple retakes due to accidental white balance shifts translates directly into financial expenditure. While proper on-set exposure and color management remain the gold standard of professional cinematography, unforeseen lighting conditions frequently compromise footage integrity.
By mastering targeted secondary color correction techniques, editors reduce the need for costly reshoots and minimize project turnaround times. Furthermore, maintaining consistent, neutral white points across multi-camera setups—where different camera sensors may interpret color temperatures slightly differently—enhances the perceived production value of the final output. Clean whites project professional polish, ensuring that corporate videos, narrative films, and commercial advertisements meet the stringent visual standards expected by modern audiences.
Ultimately, while software-based color correction cannot entirely substitute for precise technical execution during principal photography, tools like the Lumetri Color Hue vs Sat curve provide an indispensable safety net. By understanding the underlying physics of digital sensors and the mechanics of secondary color isolation, post-production professionals can consistently deliver visually compelling, pristine imagery regardless of the challenges encountered on set.